How to make an Angular 6 material design cdk & pwa app

Step 1: Get excited about new shiny things
By reading this:
https://blog.angular.io/version-6-of-angular-now-available-cc56b0efa7a4
If you need help setting up an ssl certificate, read our guide How to set-up .app domains with ssl and apache.
This guide goes over how to build & deploy an Angular 6 app using material design and pw.
So, lets build something mildly useful!
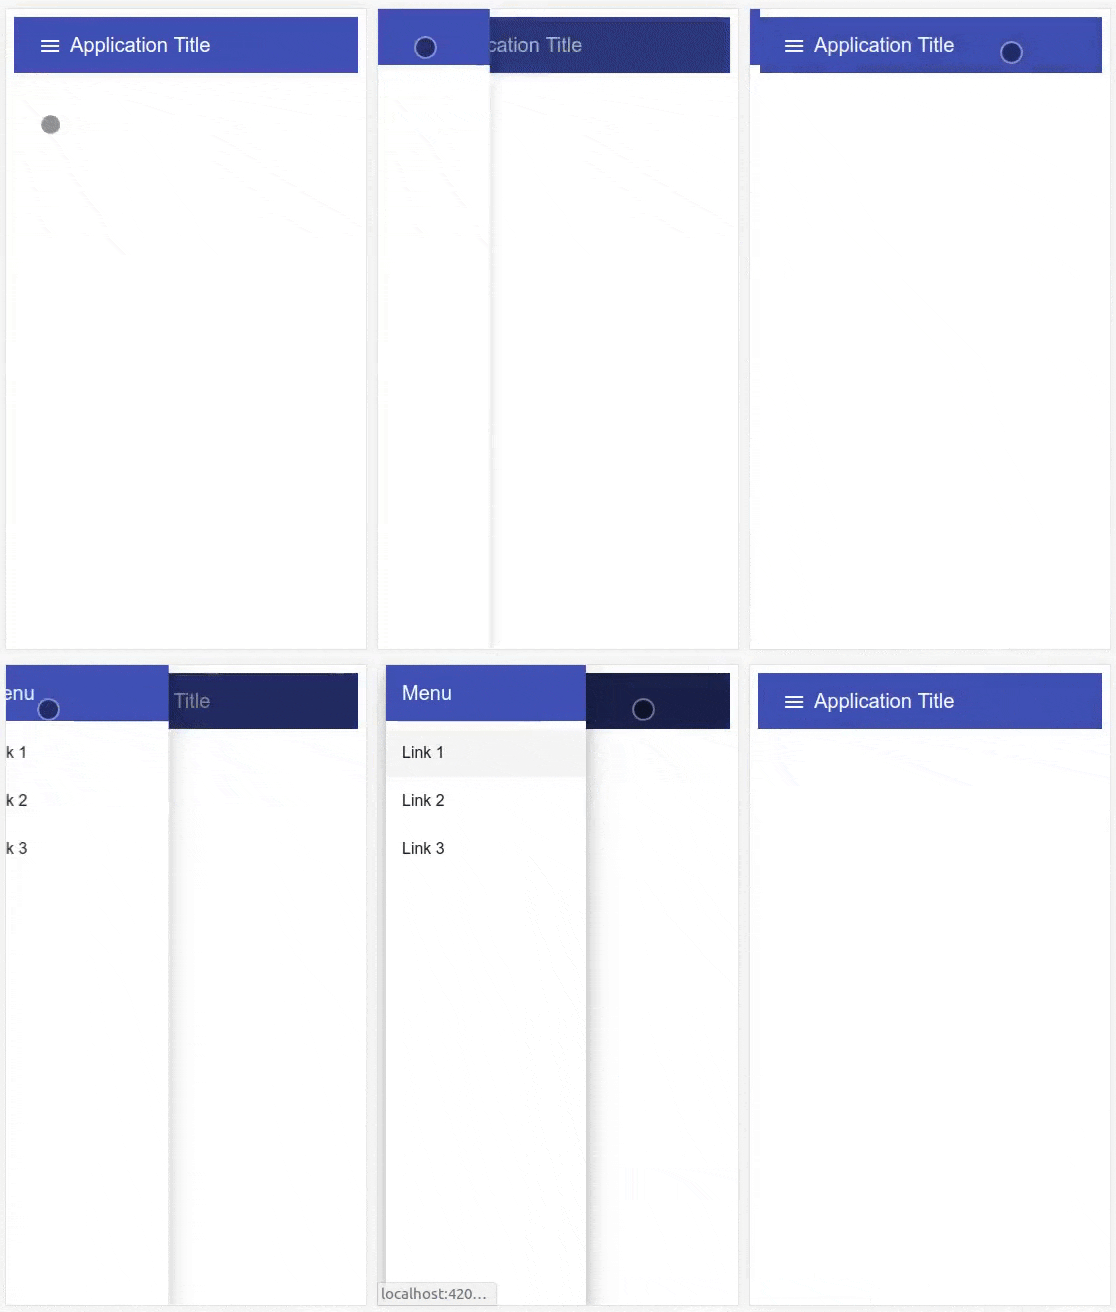
This is where we're headed:

1. Make sure you're up to date
Things quickly fall apart if you're not up to date with npm and/or node.
So update npm to the latest version:
npm install -g npm@latest
Now update node to the latest version.
We use node version manager (nvm) so you might want to install nvm first then switch to the latest version of node (which is currently 8.11.2).
nvm install v8.11.2 #Install & switch to latest node
Now it's much 'safer' to install Angular's command line tool (called ng):
npm install -g @angular/cli
2. Create your Angular 6 app using ng
Create your new app using ng new <your-app-name>. We've called ours tnetennba. These steps closley follow Angular's materialgetting started guide (but this has more detail).
Heads up! The ng tool creates your entire project for you, so navigate to the directory where you want your app to be. The
ngtool will create a project directory for you, using the name of the app you give it.For this reason, you don't need to run
node init(or yarn init for that matter) like you're used to.ngis sits above these tools. Welcome to the dizzying stacks of frontend development.
Create a new Angular 6 app in a directory called "tnetennba":
ng new tnetennba
cd tnetennba # Go into your project directory!
Add Angular material & Angular cdk packages:
From your project directory:
npm install --save @angular/material @angular/cdk
Add animations
npm install --save @angular/animations
Now you must import the BrowserAnimationsModule into your app
If you don't import BrowserAnimationsModule you'll get the (very helpful) error message: Found the synthetic listener @transform.start. Please include either "BrowserAnimationsModule" or "NoopAnimationsModule" in your application.
To import theBrowserAnimationsModule module, add it to your src/app/app.module.ts file:
Complete app.module.ts example with BrowserAnimationsModule included:
import { BrowserModule } from '@angular/platform-browser';
import { NgModule } from '@angular/core';

import { AppComponent } from './app.component';
import { MainNavComponent } from './main-nav/main-nav.component';
import { LayoutModule } from '@angular/cdk/layout';
import { MatToolbarModule, MatButtonModule, MatSidenavModule, MatIconModule, MatListModule } from '@angular/material';

@NgModule({
  declarations: [
    AppComponent,
    MainNavComponent
  ],
  imports: [
    BrowserModule,
    LayoutModule,
    MatToolbarModule,
    MatButtonModule,
    MatSidenavModule,
    MatIconModule,
    MatListModule
  ],
  providers: [],
  bootstrap: [AppComponent]
})
export class AppModule { }
Include a default Material design theme angular
Add the following to your styles.css file:
@import "~@angular/material/prebuilt-themes/indigo-pink.css";
Add gesture support (useing hammerjs)
npm install --save hammerjs
Include font icons
This is why Angular material design hamburger icon is not working on first install of Angular/material design.
To your index.html <head> section:
<link href="https://fonts.googleapis.com/icon?family=Material+Icons" rel="stylesheet">
Add Angular Material Navigation Bar
ng generate @angular/material:material-nav --name=main-nav
Note the additiona of the --name=main-nav, a lot of docs miss this out. It sets the name if your component. We've called it main-nav. This creates a new compnent which you can include in your src/app/app.component.html file.
Remove everything from your src/app/app.component.html file (it's just demo content), and replace is with just your new navigation menu:
src/app/app.component.html:
<!-- main-nav is your Material navigation bar -->
<main-nav>
</main-nav>
View your app (good luck) by running ng serve -o:
You'll get somthing that looks exactly like this!

The first thing you'll likley want to do is change Angular's material navigation title. To do this, edit your src/app/main-nav/main-nav.component.html and edit the menu title. This helps you to get a feel for the structure of angular apps. Every component is usually contained in its own folder (see Angular's official tour of heros tutorial for a complete walkthrough Angular.
Seccondly, by default Angulars material design nav bar won't close (toggle off) when you re-tap the menu item. It does if you hit the right hand side of the menu. For some this is unintuative and annoying. To make the Angular nav bar toggle edit your src/app/main-nav/main-nav.component.html file and add toggle:
Before:
<mat-toolbar color="primary">Menu</mat-toolbar>
After:
<mat-toolbar color="primary" (click)="drawer.toggle()">Menu</mat-toolbar>
We also added the toggle to the app name span tag for larger desktop screens:
<span (click)="drawer.toggle()">Tnetennba</span>
Add an angular material design table element
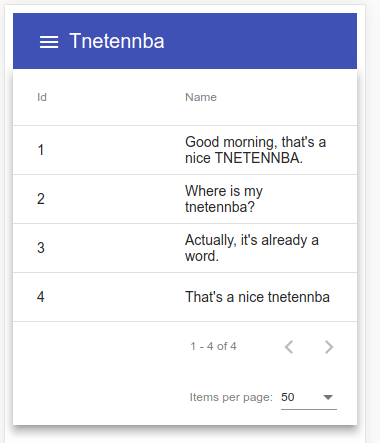
Lets make this app midly useful with a table of information.
Add angular's material:material-table package:
ng generate @angular/material:material-table --name="tnetennba-table"
Remember to pass
name="name-of-your-table"to give your table component a useful name
Now add the new component to your src/app/app.component.html file. We now have:
src/app/app.component.html
<main-nav></main-nav>
<tnetennba-table></tnetennba-table>
Which looks so:

How to deploy angular 6 and optimise!
Turn your angular 6 app into a progressive web app (pwa) to make it super speedy! Progressove web apps are an awesome way to get faster apps, be more user frieldly and ultimatly more conversions! Be useful, don't be mean.
Add a caching service worker (pwa) to your angular app:
ng add @angular/pw
That's it! The above will (in production builds) add a service worker to your builds, which will cause your app to be loaded from local caches wherever possible. To understand what's going on with progressive web apps, I suggest reading Mozilla's guides on progressive web apps. The reason I sugest Mozilla docs is that it's too easy to think this is a Google 'technology' whereas infact it's simply an application of standards which browser vendors have been collaborating on for many years.
Angular 6 production build with service wroker and pwa
Finally! To build your app with:
ng build --prod --build-optimizer
The --prod --build-optimizer flags will minify, remove dead code and all sorts of angular deployment build optmisations.
After running ng build, you'll have a complete copy of your app in the /dist folder of your project. Copy the contents up to your webserver!
Copy your app up to production!*
scp -r dist/tnetennba username@yourwebsite.app:/var/www/yourwebsite.app/
A midly useful angular 6 app using material design components and the provided pwa: https://tnetennba.app
* You might want to use a git hook to atuomatically trigger a scp copy of your files after every commit. Find out more about git hooks, and more generally, build tools such as Jenkins, deploying on container ecosystems.
