FastAPI Production Deployment with Github actions & Dokku

This FastAPI tutorial shows you how to develop and deploy python FastAPI to a server with automated deployment & TLS using Github Actions. Based on this FastAPI deployment example repo.
- Auto generated API Docs: OpenAPI & Redoc
- Github actions deployment pipeline: Actions Workflow
- Automated TLS certificate creation & renewal
- Deployment to live url based on the
mainbranch - Deployment of a
stagingbranch to a staging url
Goals: Deploy fast, cheap experimentation
- A new commit is pushed to the master branch (this could also be a merged PR)
- Github actions notices a change on the master branch
- A new deployment is triggered (using Dokku, Deploy action) by Ido Berkovich
- The new deployment is processed by Dokku and published.
- The deployment has TSL enabled, with auto-renewal
- Keep iterating
Deployment first. Don't leave deployment until the last stage of your project, start early and verify your deployment strategy.
FastAPI Deployment Tutorial
Create a new VPS server with Ubuntu LTS, for example use Vultr $100 free or Digital Ocean
SSH into your VPS
ssh root@<your-vps-ip>
Install Dokku
  wget https://raw.githubusercontent.com/dokku/dokku/v0.21.4/bootstrap.sh
  sudo DOKKU_TAG=v0.21.4 bash bootstrap.sh
On the smallest VPS instances this process takes about 5-10 minutes.
Configure your app on the Dokku server
After the installation is complete, visit the ip address of your dokku server in a web brower:
Add your local ssh public key to your Dokku server. If you don't know how to create your own ssh key, follow these instructions.
Paste in your local public key (e.g, from your local host: cat ~/.ssh/id_rsa.pub) then copy/paste into Public SSH Keys:

Make sure you tick "Use virtualhost naming for apps". This creates prettier urls without needing the port number.
Press Finish setup. This will take you to the very good Dokku documentaion. Continue to read this doument if you want to deploy FastAPI.
Create your first app on Dokku
SSH into your VPS server: ssh root@<ip-address.
# Change to the dokku user
su dokku;
cd;
Create the FastAPI app
dokku@dokku:~$ dokku apps:create fastapi
-----> Creating fastapi...
dokku@dokku:~$
Initalise a bare git repo for the app:
Dokku will become a git remote for your app repo, so you need to initialize the git repo for your app on your dokku server:
dokku@dokku:~$ dokku git:initialize fastapi
-----> Initializing git repository for fastapi
Verify Dokku is working
Before we connect Github action to your deployment, let's verify you can manually push to your Dokku server and trigger a deployment.
On your local machine
In your local repo, add your dokku server as a git remote:
git remote add dokku dokku@<your-vps-ip>:<repo-name>
E.g.:
git remote add dokku dokku@192.168.1.1:fastapi
Change the IP to your VPS server ip.
Add your local public key to your dokku server:
If you don't know how to create your own ssh key, follow these instructions.
The following command will copy your public key to your Dokku server, allowing you to git push origin master to your Dokku server from your local machine.
cat ~/.ssh/id_rsa.pub | ssh root@<your-vps-ip-address> dokku ssh-keys:add mylocal
root@<your-vps-ip-address>'s password:
SHA256:C0V/MHPBhBWrgLrlzy+xT4Jt+BaRwT/aiw4wnF+2yk0
You can verify your key has been added by doing something like:
cat ~/.ssh/id_rsa.pub | ssh root@<your-vps-ip-address> cat /home/dokku/.ssh/authorized_keys
# You should see your public key returned back
Create your first FastAPI / Dokku Deployment!
The fun starts! Now you have your Dokku server, and FastAPI repo ready, you can do a git push dokku master to generate the first deployment:
git push dokku master
Enumerating objects: 36, done.
Counting objects: 100% (36/36), done.
Delta compression using up to 8 threads
Compressing objects: 100% (22/22), done.
Writing objects: 100% (36/36), 2.87 KiB | 489.00 KiB/s, done.
Total 36 (delta 11), reused 0 (delta 0)
-----> Cleaning up...
-----> Building fastapi from dockerfile...
remote: build context to Docker daemon 7.68kB
Step 1/5 : FROM tiangolo/uvicorn-gunicorn-fastapi:python3.7
python3.7: Pulling from tiangolo/uvicorn-gunicorn-fastapi
...lots more output
-----> Attempting pre-flight checks (web.1)
Waiting for 10 seconds ...
Default container check successful!
-----> Running post-deploy
-----> Creating new app virtual host file...
-----> Configuring api.pcpink.co.uk...(using built-in template)
-----> Creating http nginx.conf
Reloading nginx
-----> Renaming containers
Renaming container (4a2bb8363848) fervent_goldberg to fastapi.web.1
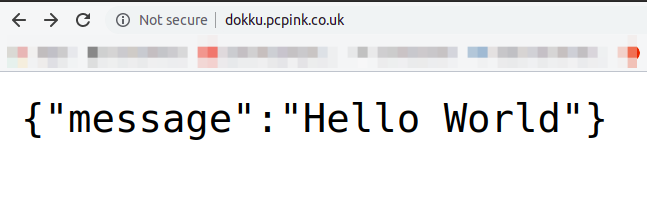
=====> Application deployed:
http://api.pcpink.co.uk
Dokkue will take your repo, and produce a build from the Dokkerfile in your repo.
Visit your Dokku server ip address, and you will see your FastAPI app has been deployed!
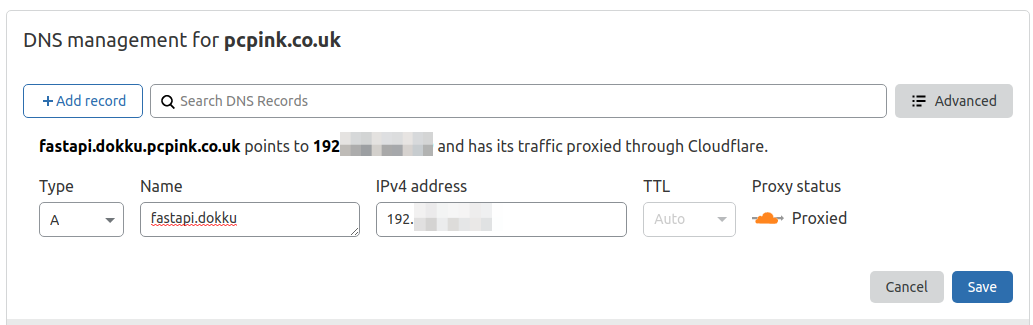
If you configure your DNS correctly, you can point a subdomain to your FastAPI deployment. For example, here's an A record for the subdomain created using Cloudflare's DNS management:
You could also tie your into Cloudflares infrastucure even more by using their free ssl termination, but don't do that, instead, use the dokku letsencrypt plugin.
Create a private keys for Dokku (and Github actions)
SSH into your VPS server.
Create an public/private keypair with no password. We will use the private key generated here in Github actions pipeline for the Dokku deployment:
Generate the keypair:
root@dokku:~# ssh-keygen
Generating public/private rsa key pair.
Enter file in which to save the key (/root/.ssh/id_rsa): /root/.ssh/dokku
Created directory '/root/.ssh'.
Enter passphrase (empty for no passphrase):
Enter same passphrase again:
Your identification has been saved in /root/.ssh/dokku.
Your public key has been saved in /root/.ssh/dokku.pub.
Allow this key to be used by github actions (we will copy the private key later into Github actions secrets)
On your dokku server, append the dokku public key to authorized_keys:
cat /root/.ssh/dokku.pub >> /home/dokku/.ssh/authorized_keys
Setup Github Actions
Now it's time to connect up githb actions for automated deployments (yes, with no testing, audit, or stress test stages) but it's still fantastic.

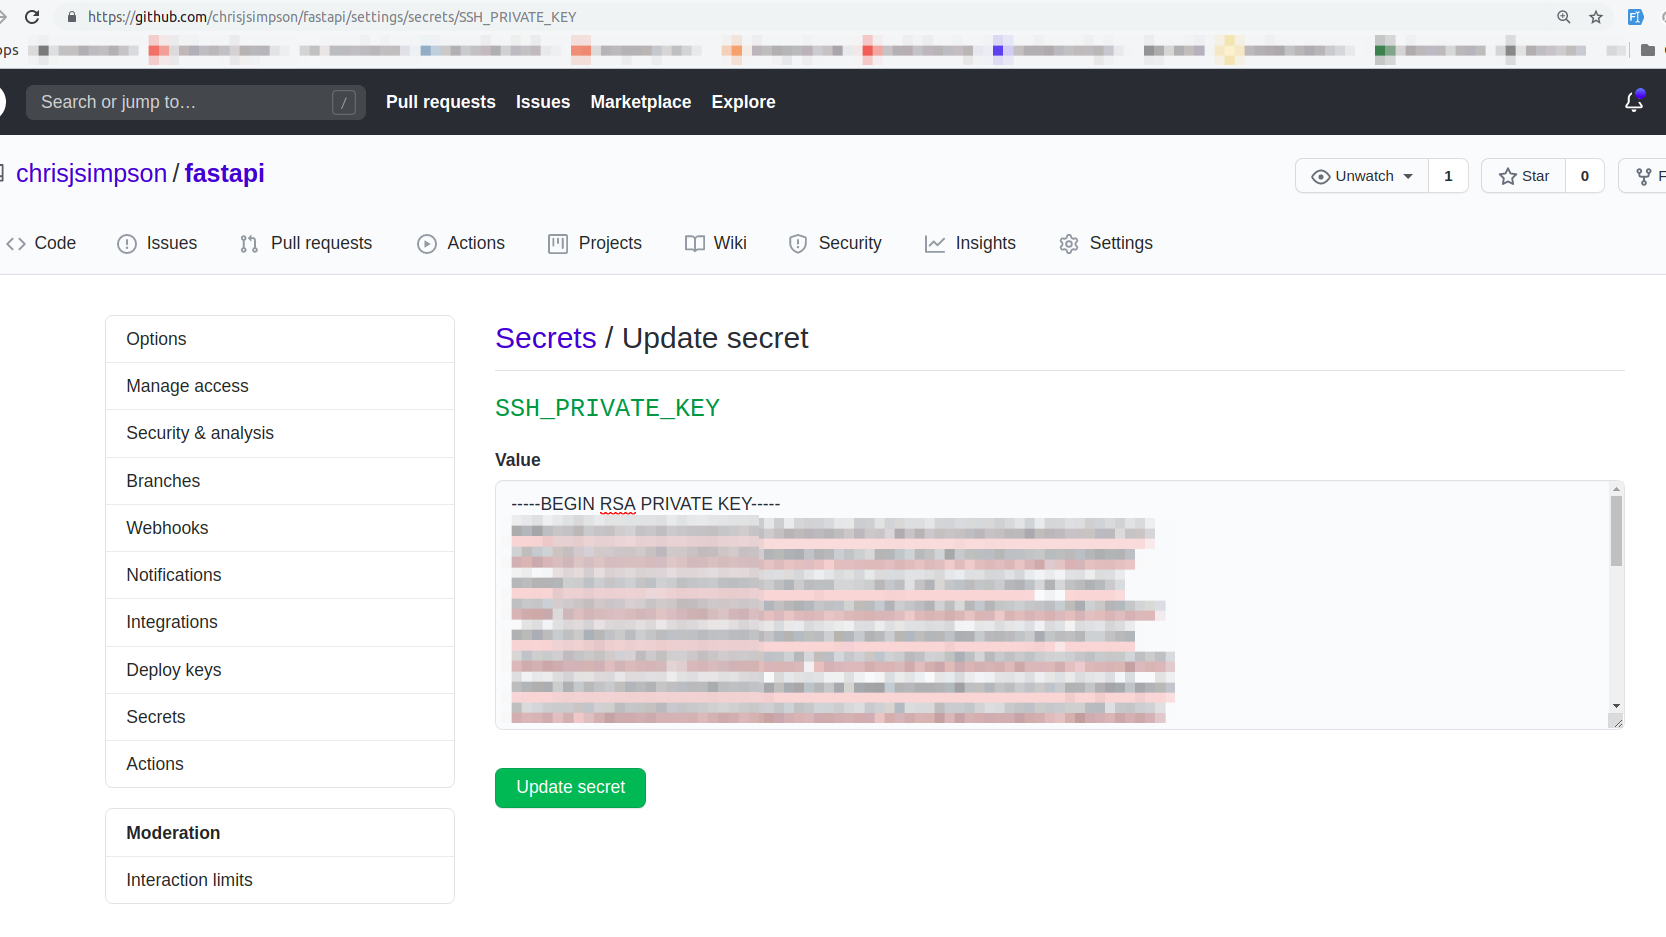
Ensure the following secrets are input in your repo's secrets:
SSH_PRIVATE_KEYDOKKU_HOSTDOKKU_APP_NAME
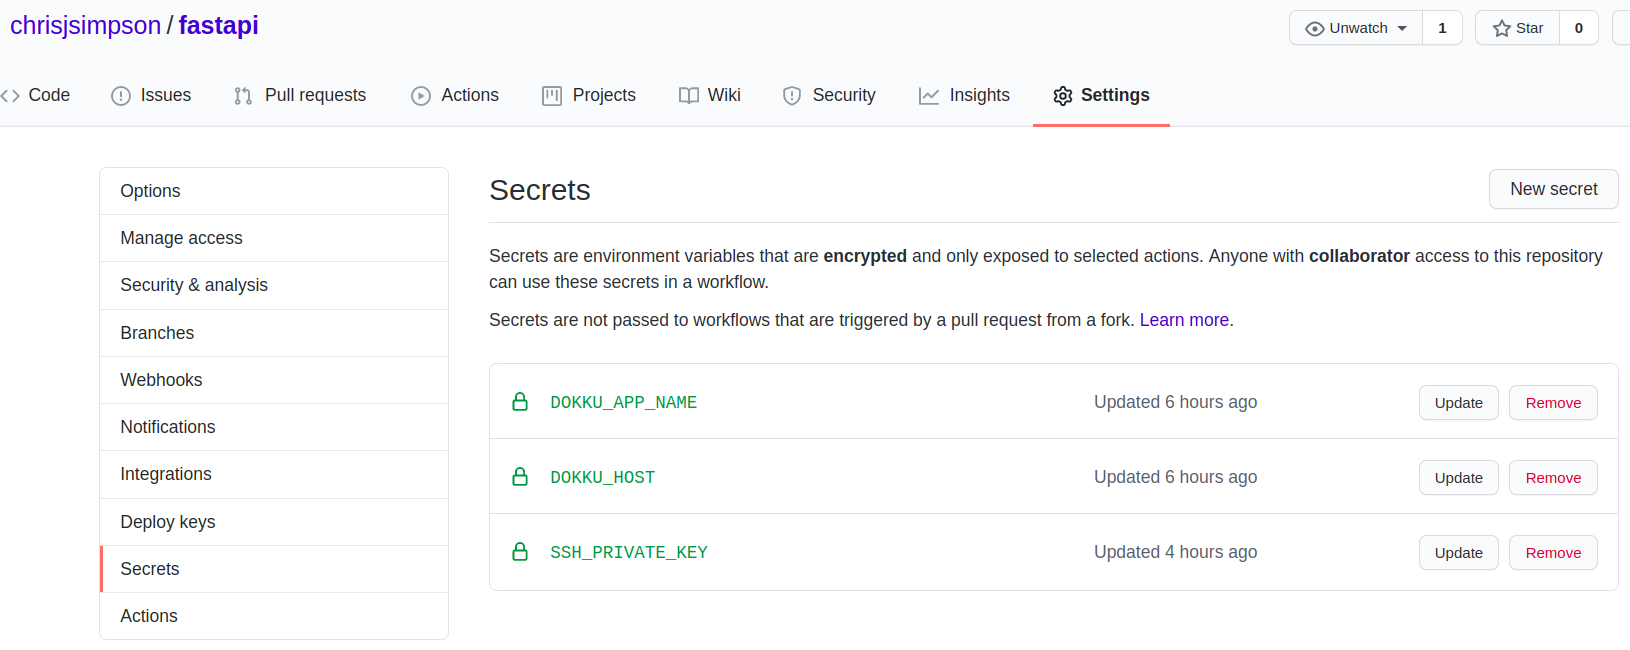
The url is: https://github.com/<username>/<reponame>/settings/secrets
For example, mine is: https://github.com/chrisjsimpson/fastapi/settings/secrets/
SSH_PRIVATE_KEY- Copy the Dokku server private key as the value (e.g from the server, runcat /root/.ssh/dokkuand copy/paste the value)DOKKU_HOSTis your dokku server IP addressDOKKU_APP_NAMEis fastapi (all lowercase)
Example:
The next time you commit to your repo's master branch, Github actions will automactically generate a new deployment of your api. Awesome!
Example pipeline run:
Here's a pipeline triggered in which
- A new commit is pushed to the master branch (this could also be a merged PR)
- Github actions notices a change on the master branch
- The Dokku Deploy action is triggered
- A new deployment is processed by Dokku and published.
How do I get TLS working with automated renewal?
dokku-letsencrypt plugin to the rescue!
ssh into your dokku server:
Install the dokku-letsencrypt plugin:
sudo dokku plugin:install https://github.com/dokku/dokku-letsencrypt.git
Set your email: Must be a real eamil address
dokku config:set --no-restart fastapi DOKKU_LETSENCRYPT_EMAIL=admin@example.com
First, when you're debugging, use the letsencrypt staging server:
dokku config:set --no-restart fastapi DOKKU_LETSENCRYPT_SERVER=staging
The above will generate test certificates, use curl -v -k <your domain> to test them.
Once you're happy, you can generate real certificates by turning off staging and uring production certificates:
dokku config:unset --no-restart fastapi DOKKU_LETSENCRYPT_SERVER
Run dokku-letsencrypt:
dokku letsencrypt fastapi
Watch the beautiful process:
root@dokku:~# dokku letsencrypt fastapi
=====> Let's Encrypt fastapi
-----> Updating letsencrypt docker image...
0.1.0: Pulling from dokku/letsencrypt
Digest: sha256:af5f8529c407645e97821ad28eba328f4c59b83b2141334f899303c49fc07823
Status: Image is up to date for dokku/letsencrypt:0.1.0
docker.io/dokku/letsencrypt:0.1.0
       Done updating
-----> Enabling ACME proxy for fastapi...
[ ok ] Reloading nginx configuration (via systemctl): nginx.service.
-----> Getting letsencrypt certificate for fastapi...

--- more logs---
[ ok ] Reloading nginx configuration (via systemctl): nginx.service.
   done
Verify port mappings for container:
root@dokku:~# dokku proxy:ports fastapi
-----> Port mappings for fastapi
    -----> scheme  host port  container port
    http           80         80
    https          443        80
Help, I just wnat the top level domain with TLS, not a subdomain. I'm seeing "too many redirects".
Remove your subdomain:
dokku domains:remove fastapi subdomain.example.com
Add your default site url to your app, e.g:
dokku domains:add fastapi pcpink.co.uk
Then run letsencypt again:
dokku letsencrypt fastapi
If you want to, add both a tls certificate for the a subdomain and a tld serving the same app:
dokku domains:add fastapi api.pcpink.co.uk
dokku letsencrypt fastapi
Setup certificate auto-renewal
dokku letsencrypt:cron-job --add
Will add a crontab for the dokku user to auto renew the certificates.
How do I change my domain/subdomain?
I don't like my subdomain, how do I change it?
ssh into your dokku server and:
dokku domains:add fastapi example.com
Where fastapi is the app name. Then create the necessary A records.
Setup a Staging server
Wouldn't it be cool if we could
- Publish changes to a 'staging' branch*
- Have an automated pipeline to publish this?
- Get a url to visit with the latest staging build, just like the main branch (aka production)
- I'm on the fence as to whether this notion of having a 'staging' branch is actually good. In practice, it creates a barrier e.g. who/what is allowed to be merged into this staging branch? And, when is it OK to merge staging into the main branch? These are opionins, do what's right for the happines of your team and delivery of your software.
How to set-up a staging site & automated deployment with Dokku
-
Clone the existing app:
dokku apps:clone fastapi fastapi-staging -
Create DNS A record for staging site: e.g. fastapi-staging.example.com
-
Set deploy branch to staging
dokku git:set fastapi-staging deploy-branch staging -
Create a TLS certificate for the staging domain:
dokku letsencrypt fastapi-staging -
Create a Github secret called
DOKKU_APP_NAME_STAGINGwith the valuefastapi-staging
The Dokku deploy Github Action we're using allows us to specify the dokku app we're deploying to. As you'll recall, we cloned the production app to another app called fastapi-staging.
- Create a GitHub actions workflow which triggers only on the
stagingbranch.
GitHub action workflows require you to create a seperate workflow.yaml for each branch, this is different from other pipeline systems like GitLabs, for example
Here's a complete example:
<repo-root-directory>.github/workflows/staging.yaml
name: Deploy to dokku staging
on:
  push:
    branches:
      - staging
jobs:
  deploy:
    runs-on: ubuntu-20.04
    steps:
    - uses: actions/checkout@v2
      with:
        fetch-depth: 0
    - id: deploy
      name: Deploy to dokku
      uses: idoberko2/dokku-deploy-github-action@v1
      with:
        ssh-private-key: ${{ secrets.SSH_PRIVATE_KEY }}
        dokku-host: ${{ secrets.DOKKU_HOST }}
        app-name: ${{ secrets.DOKKU_APP_NAME_STAGING }}
        remote-branch: 'staging'
Also, here's a real workflow example and a real example staging pipeline.
Notice 2 things in the workflow file:
- We're running the Github Action "
on -> push -> branched -> staging", as per GitHub Actions Docs - We've added
remote-branch: 'staging'for the Dokku deploy action, as mentioned in the Docs for the dokku-deploy-github-action
Dokku how to set .env environment variables?
Here's an example:
For our FastAPI authentication, we need to set the SECRET_KEY for our jwt token. In our code, we access it via an environment variable called SECRET_KEY, via os.getenv('SECRET_KEY') rather than writing secrets in our source code.
To set this environment variable in your Dokku deployment, run the following commands
-
We create a random string for your JWT secret:
dokku@dokku:~$ openssl rand -hex 32 b6d4c0c33906ecbeb2e309aeece3423eb2a9584e09a74ec8cabf71768915cbf4 -
Login to your Dokku server, and apply the envrionment variable to your app e.g.
dokku config:set fastapi-staging SECRET_KEY=b6d4c0c33906ecbeb2e309aeece3423eb2a9584e09a74ec8cabf71768915cbf4
You can also set environment variables from a file rather than individually.
Things to consider:
- Authentication (in progress)
- Lots more