Getting Started with Asterisk

When working in a small business, especially those with remote workers, keeping on top of how clients and customers can contact you gets tricky. You don't want to expose your employee's personal phone numbers, but you also don't want them chained to a prehistoric landline.
PBX systems are used by large businesses, they're effectively private phone systems that allow calls between users, managing calls, IVRs and mapping multiple users to one phone number (allowing anyone to take calls). Most systems that are for offer are £££ and far too advanced for SMEs, many are built from an open-source platform called Asterisk. In this blog post, we'll install a basic install of Asterisk onto a Virtual Ubuntu 16.04 machine and configure it to allow for internal calls. This'll allow Bob (for example) in Room 101 to call Sue in Room 102 - revolutionary!
Your virtual environment
Get started by installing Ubuntu 16.04 on a virtual machine, in this instance, I'm using Parallels Desktop for macOS 10.13. It shouldn't need more than 1GB of RAM and 10GB of SSD, but feel free to fling more wonga at it if you feel generous.

Keep it lightweight, you don't need Apache etc just keep 'standard system utilities' checked. Once you've installed the OS, update and upgrade it:
sudo apt-get update
sudo apt-get upgrade
Installing Asterisk
We'll need to install some packages to allow us to build Asterisk:
sudo apt-get install build-essential wget libssl-dev libncurses5-dev libnewt-dev libxml2-dev linux-headers-$(uname -r) libsqlite3-dev uuid-dev
This may take a little while depending on your internet connection, after this we can download the latest version of the Asterisk package from their website:
wget http://downloads.asterisk.org/pub/telephony/asterisk/asterisk-15-current.tar.gz
tar zxvf asterisk-15-current.tar.gz
cd asterisk-15.5.0/
Now run ./configure, this checks your system to see if all required packages are installed and the environment is okay. You may (like myself) be asked to install a couple before continuing.
An example error I encounted:
configure: error: *** JSON support not found (this typically means the libjansson development package is missing)
To fix install:
sudo apt-get install libjansson-dev
Run ./configure again until you see the following:
               .$$$$$$$$$$$$$$$=..
            .$7$7..          .7$$7:.
          .$$:.                 ,$7.7
        .$7.     7$$$$           .$$77
     ..$$.       $$$$$            .$$$7
    ..7$   .?.   $$$$$   .?.       7$$$.
   $.$.   .$$$7. $$$$7 .7$$$.      .$$$.
 .777.   .$$$$$$77$$$77$$$$$7.      $$$,
 $$$~      .7$$$$$$$$$$$$$7.       .$$$.
.$$7          .7$$$$$$$7:          ?$$$.
$$$          ?7$$$$$$$$$$I        .$$$7
$$$       .7$$$$$$$$$$$$$$$$      :$$$.
$$$       $$$$$$7$$$$$$$$$$$$    .$$$.
$$$        $$$   7$$$7  .$$$    .$$$.
$$$$             $$$$7         .$$$.
7$$$7            7$$$$        7$$$
 $$$$$                        $$$
  $$$$7.                       $$  (TM)
   $$$$$$$.           .7$$$$$$  $$
     $$$$$$$$$$$$7$$$$$$$$$.$$$$$$
       $$$$$$$$$$$$$$$$.

configure: Package configured for:
configure: OS type  : linux-gnu
configure: Host CPU : x86_64
configure: build-cpu:vendor:os: x86_64 : pc : linux-gnu :
configure: host-cpu:vendor:os: x86_64 : pc : linux-gnu :
connor@ubuntu:~/asterisk-15.4.1$
Now run:
make
This compiles Asterisk ready for install on your system, it may take a little while, so feel free to go and make a coffee whilst it runs. If everything went smoothly you should see:
 +--------- Asterisk Build Complete ---------+
 + Asterisk has successfully been built, and +
 + can be installed by running:              +
 +                                           +
 +                make install               +
 +-------------------------------------------+
Run the following command to get it installed (you may need to run with sudo):
make install
Once installed, you'll be offered to install some sample test files, to do this run (again might need to run as sudo):
make samples
This installs some sample files in the /configs/sample directly. We can now access Asterisk from the command line using the command:
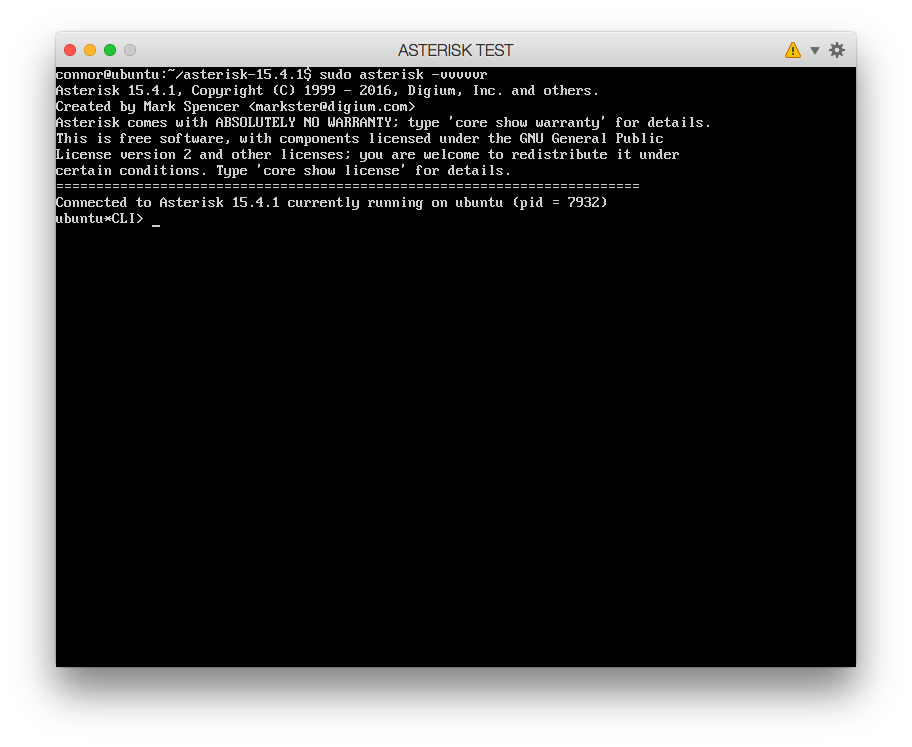
sudo asterisk -cvvvv
We use 'c' as we want to go into console mode, and the number of 'v' arguments equates to the level of debug output, with 3 being output all debugging messages. If your installation was successful, you should see this:
Configuring Asterisk
We've got Asterisk set up, but that doesn't mean we can start calling everyone about the weather just yet. We need to define some extension numbers for users to associate with. For this tutorial we'll be using the following extensions & users:
- Jane Doe - Ext. 201
- Tom Smith - Ext. 202
- Sam Clegg - Ext. 203
We'll be using a Polycom IP phone for Jane, with Tom and Sam using the LinPhone softphone client for macOS.
Configuring Users
Start by opening the users.conf file located at:
/etc/asterisk/users.conf
Make sure you open with write permissions!
Add the following text right at the bottom of the file:
[201]
fullname = Jane Doe     ; User's full name
secret = password123    ; User's password used to login to SIP
hassip = yes            ; Tells Asterisk to create a SIP account
context = users         ; Groups the user into the group 'users'
host = dynamic          ; The SIP host can be any IP, not fixed (handy for DHCP)

[202]
fullname = Tom Smith    ; User's full name
secret = password456    ; User's password used to login to SIP
hassip = yes            ; Tells Asterisk to create a SIP account
context = users         ; Groups the user into the group 'users'
host = dynamic          ; The SIP host can be any IP, not fixed (handy for DHCP)

[203]
fullname = Sam Clegg    ; User's full name
secret = password789    ; User's password used to login to SIP
hassip = yes            ; Tells Asterisk to create a SIP account
context = users         ; Groups the user into the group 'users'
host = dynamic          ; The SIP host can be any IP, not fixed (handy for DHCP)
What did we just enter?
- [number]
- This refers to the username of the user, whilst this can be text for larger systems it's easier to use numerical usernames
- fullname
- The user's full name
- secret
- The user's password, make sure it's something more secure than this demo!
- hassip
- Tells Asterisk to create a SIP account for this user, Asterisk supports a few other account types, but to make calls in this demo we'll need SIP
- context = users
- Context is basically a group/category, allows different users to dial certain groups, e.g. maybe don't allow sales to call IT.
- host = dynamic
- Tells Asterisk that this user can use any IP address, not a static/fixed address, very handy for DHCP enabled networks
Save this file and restart asterisk by doing the following:
sudo asterisk -rvvvv
reload
sip show users
If successful you should see:
ubuntu*CLI> sip show users
Username                   Secret           Accountcode      Def.Context      ACL  Forcerport
203                        password789                       users            No   No
202                        password456                       users            No   No
201                        password123                       users            No   No
Configuring Phones
We've got some users configured now, let's add some end devices that can be used to make/receive calls. First, find out the IP address of your Asterisk server, in this demo we'll only be looking at a local network installation of Asterisk.
To find out your IP, type:
ifconfig
For example my virtual machine is running on: 192.168.1.125
connor@ubuntu:~$ ifconfig
enp0s5    Link encap:Ethernet  HWaddr 00:1c:42:f7:d2:d8
          inet addr:192.168.1.125  Bcast:192.168.1.255  Mask:255.255.255.0
          inet6 addr: fe80::21c:42ff:fef7:d2d8/64 Scope:Link
          UP BROADCAST RUNNING MULTICAST  MTU:1500  Metric:1
          RX packets:1507 errors:0 dropped:3 overruns:0 frame:0
          TX packets:63 errors:0 dropped:0 overruns:0 carrier:0
          collisions:0 txqueuelen:1000
          RX bytes:261577 (261.5 KB)  TX bytes:8991 (8.9 KB)

lo        Link encap:Local Loopback
          inet addr:127.0.0.1  Mask:255.0.0.0
          inet6 addr: ::1/128 Scope:Host
          UP LOOPBACK RUNNING  MTU:65536  Metric:1
          RX packets:176 errors:0 dropped:0 overruns:0 frame:0
          TX packets:176 errors:0 dropped:0 overruns:0 carrier:0
          collisions:0 txqueuelen:1
          RX bytes:13296 (13.2 KB)  TX bytes:13296 (13.2 KB)
Configuring Polycom IP Phone
Navigate to the Polycom IP phone's web configuration wizard by typing the IP address into a browser's address bar, make sure you use HTTPS else it won't connect.
Enter '456' as the password, then click 'Login'
Hover over 'Settings' then click 'Lines'
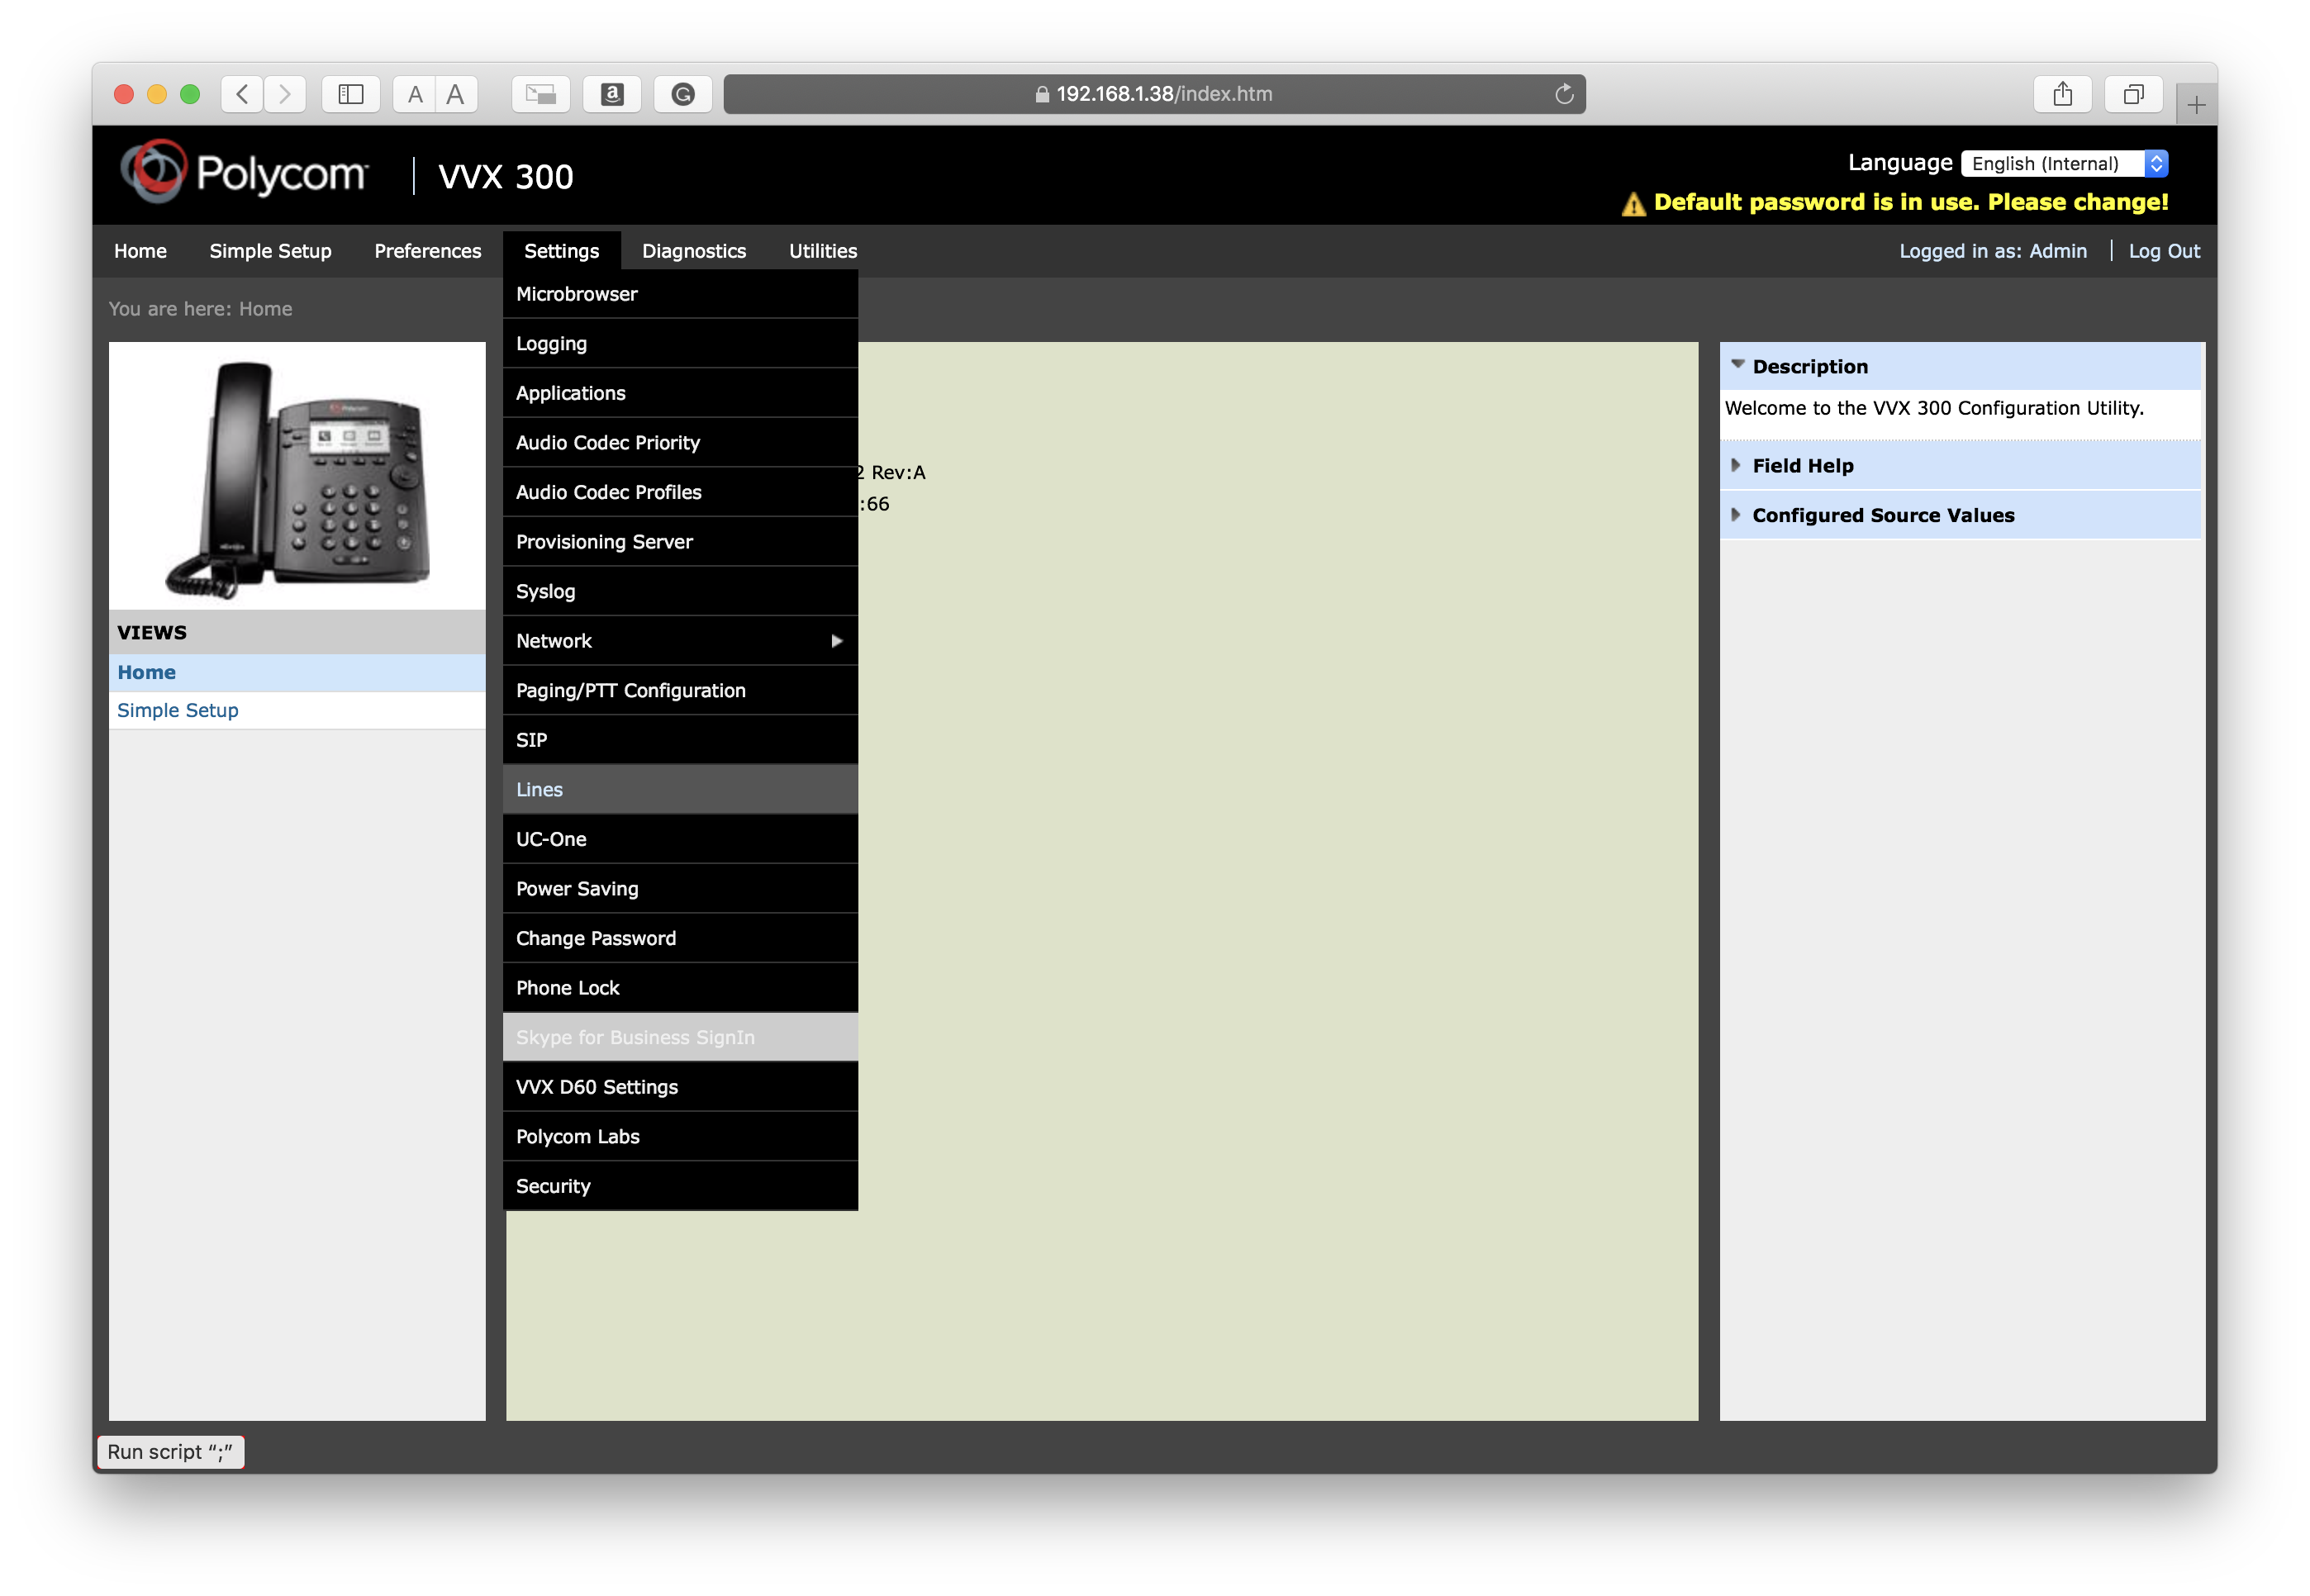
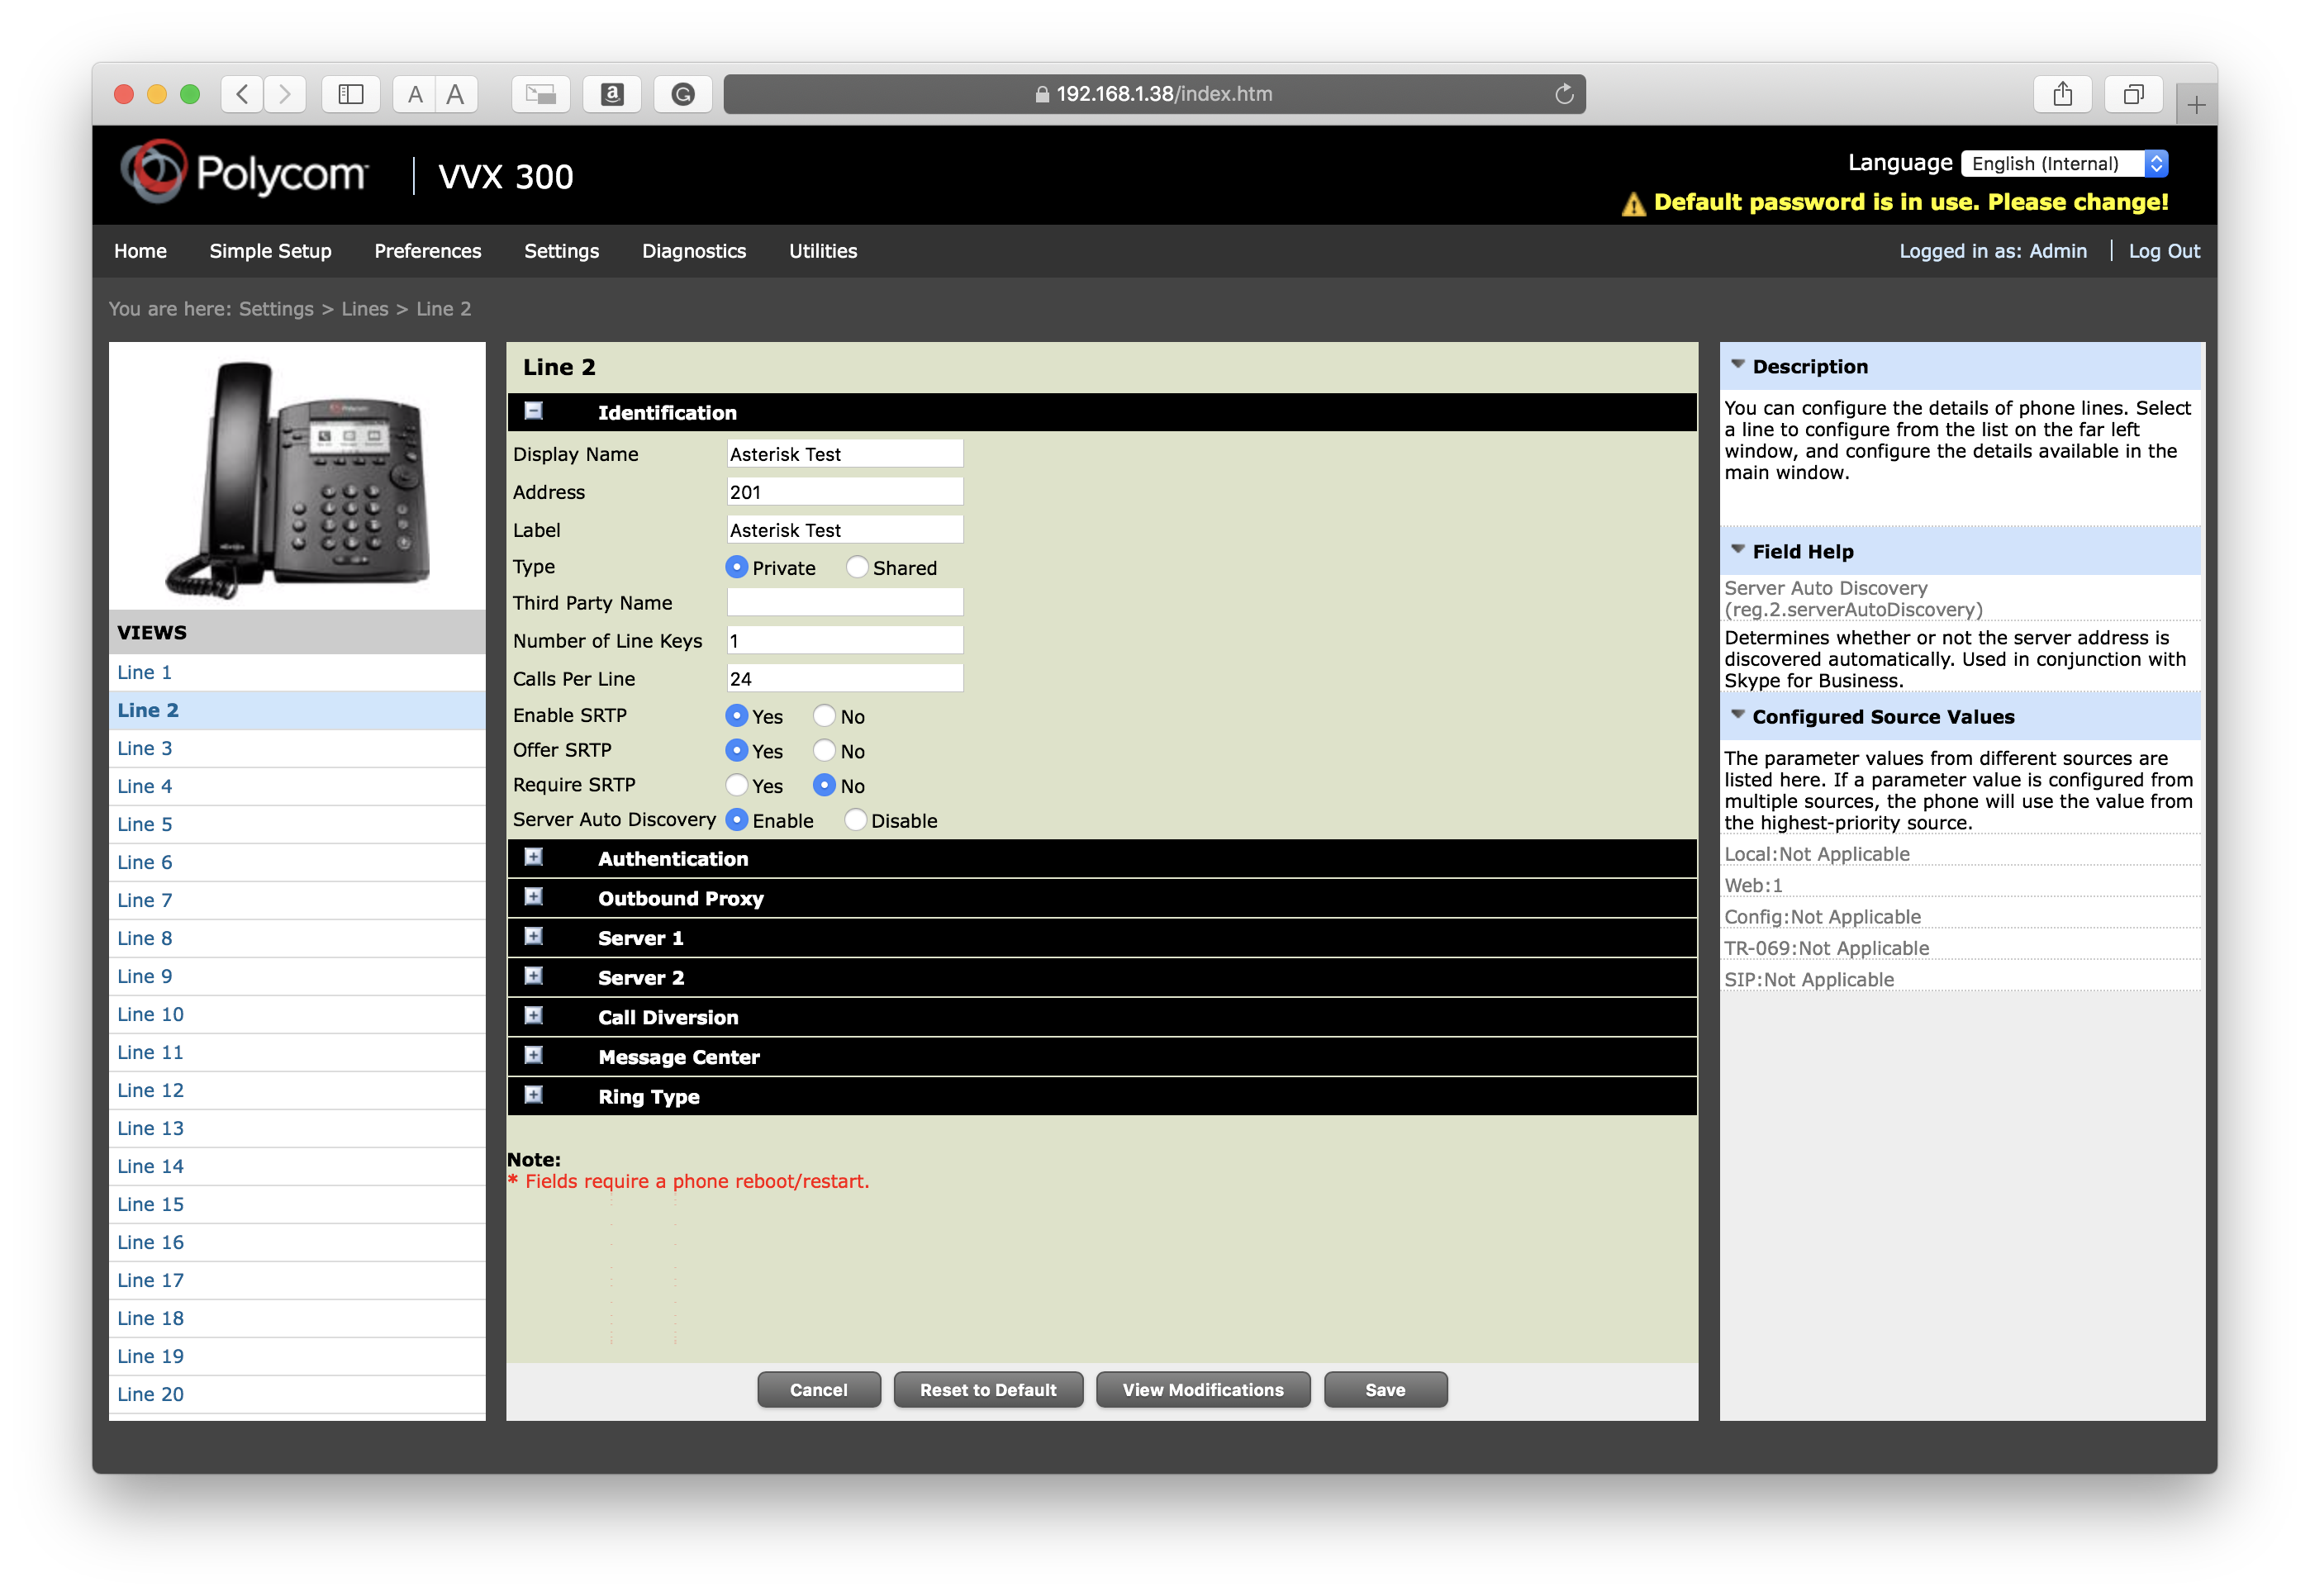
I'll be using 'Line 2' (as my first line is for business VoIP), go ahead and add the information required such as Label (this is what the line shows as on the screen)
Under the authentication header, enter the IP address of your Asterisk server and your username and password. Here the username is: 201 and the password is password123.
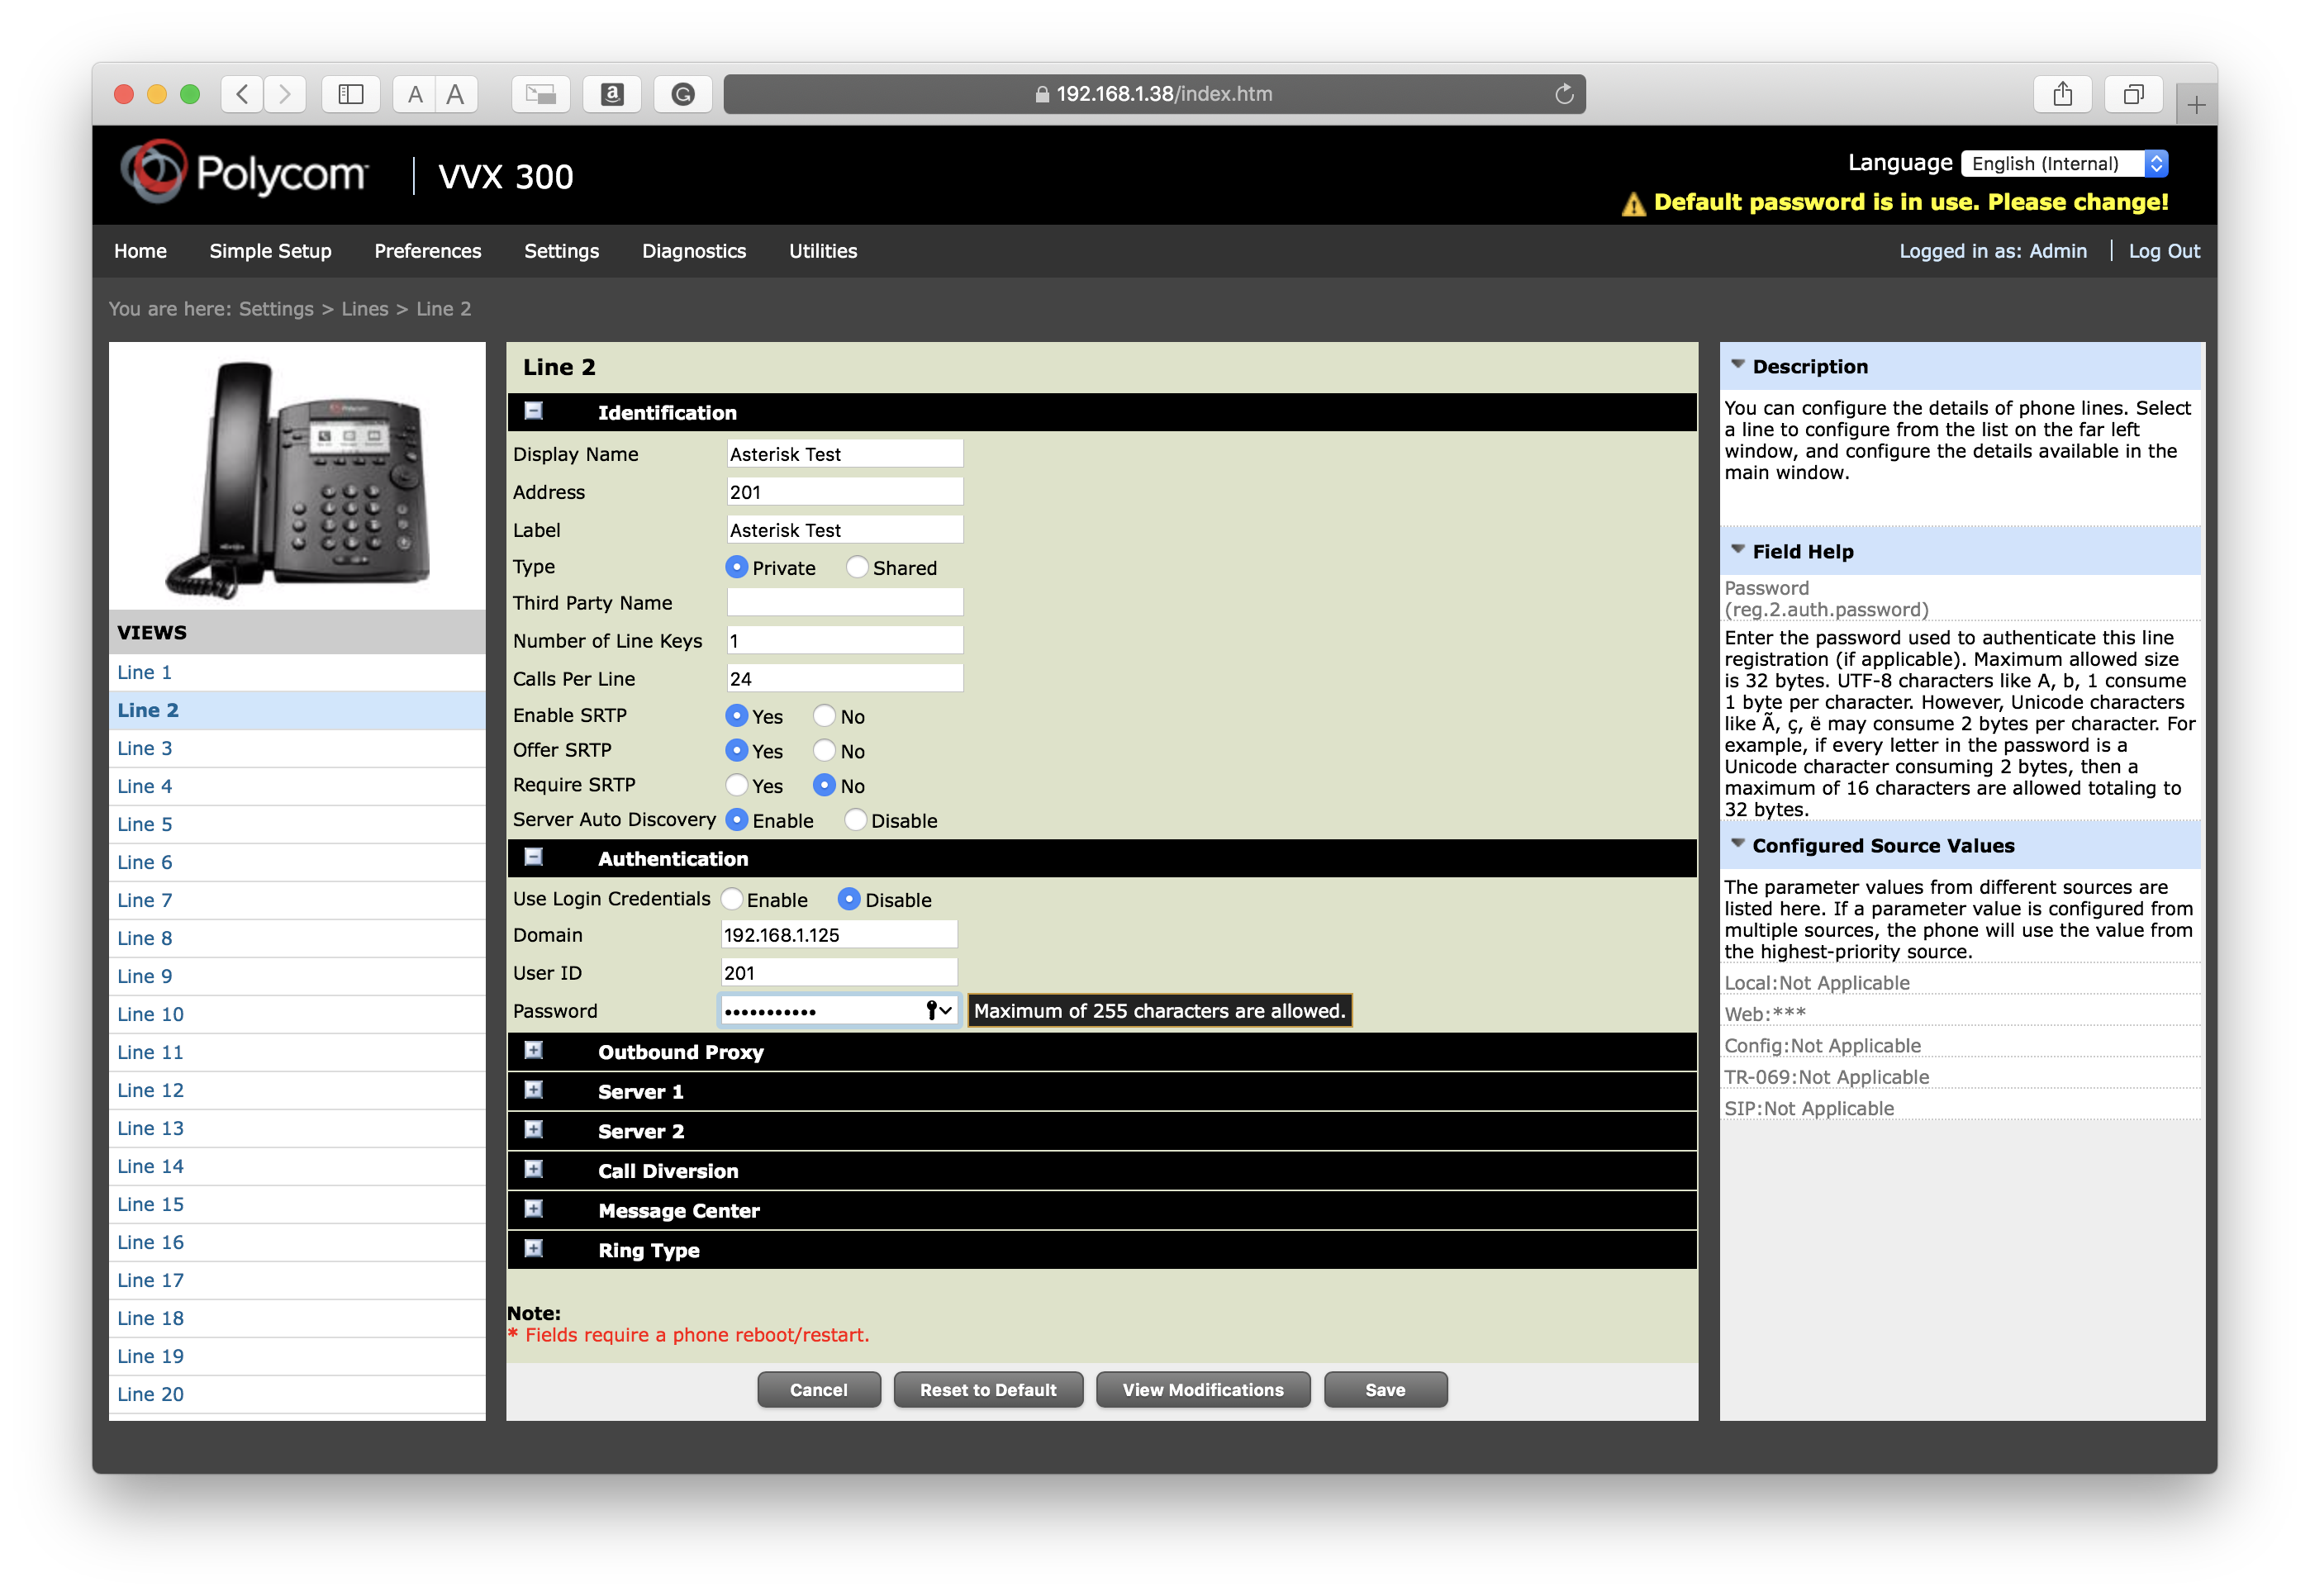
Finally under 'Server 1', add the IP address of the Asterisk server again. Then click save.
If it all worked, you should see this in the console log:
-- Registered SIP '201' at 192.168.1.38:5060
> Saved useragent "PolycomVVX-VVX_300-UA/5.6.0.17325" for peer 201
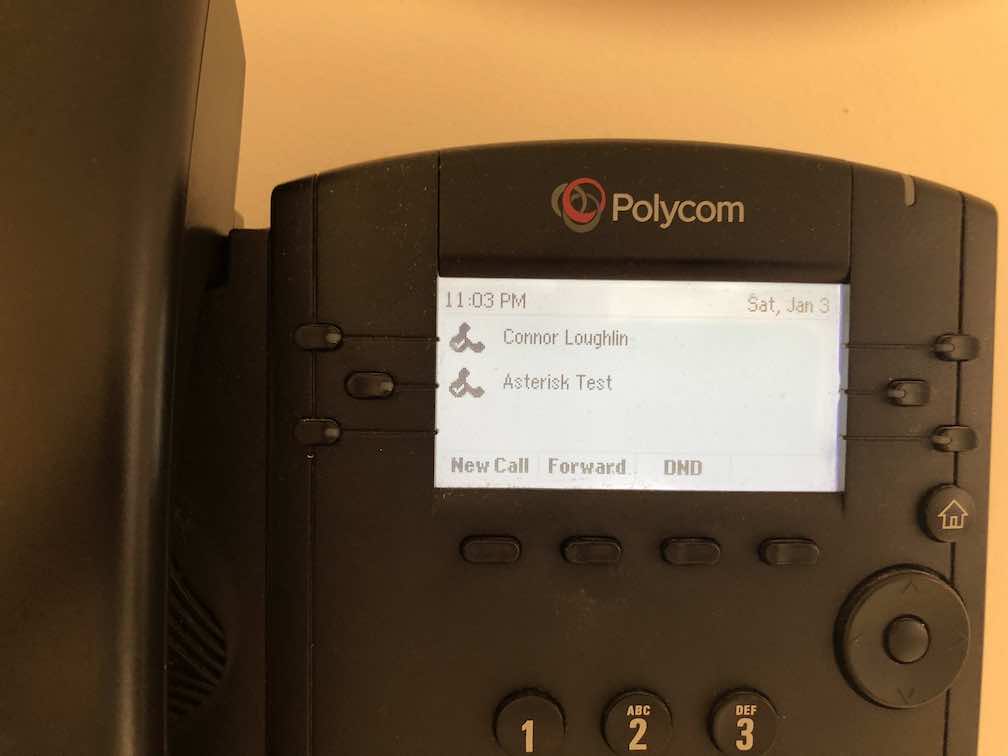
And this on the phone screen:
Configuring Extensions
We've managed to connect the IP and Softphones to the server, but you'll see we can't actually dial anyone yet. This is because we haven't configured the 'extensions' file to tell Asterisk what to do when someone calls a number. You can see this by watching the verbose log when dialing a user:
[Jul 13 16:30:20] NOTICE[1431][C-00000002]: chan_sip.c:26513 handle_request_invite: Call from '201' (192.168.1.38:5060) to extension '202' rejected because extension not found in context 'users'.
Start by copying the extensions.conf file to extensions.conf.backup because it contains lots of important tips and help
cp /etc/asterisk/extensions.conf /etc/asterisk/extensions.conf.back
Once you've done this, empty the extensions.conf file and enter:
[users]
exten=>201,1,Dial(SIP/201,20)
exten=>202,1,Dial(SIP/202,20)
exten=>203,1,Dial(SIP/203,20)
Reload Asterisk again and try dialling 202 from the IP phone, you should see this in the console log:
*CLI>   == Using SIP RTP CoS mark 5
       > 0x7fa808001080 -- Strict RTP learning after remote address set to: 192.168.1.38:2238
    -- Executing [202@users:1] Dial("SIP/201-00000000", "SIP/202,20") in new stack
[Jul 13 17:43:47] WARNING[1624][C-00000008]: app_dial.c:2512 dial_exec_full: Unable to create channel of type 'SIP' (cause 20 - Subscriber absent)
  == Everyone is busy/congested at this time (1:0/0/1)
    -- Auto fallthrough, channel 'SIP/201-00000000' status is 'CHANUNAVAIL'
That's because we haven't set up the additional softphone clients yet!
Configuring SoftPhone clients
Whilst there are many paid/free/opensource Softphone clients out there, we'll be using LinPhone. Download it from their website for the client you're using (in this case macOS 10.13) and install it.
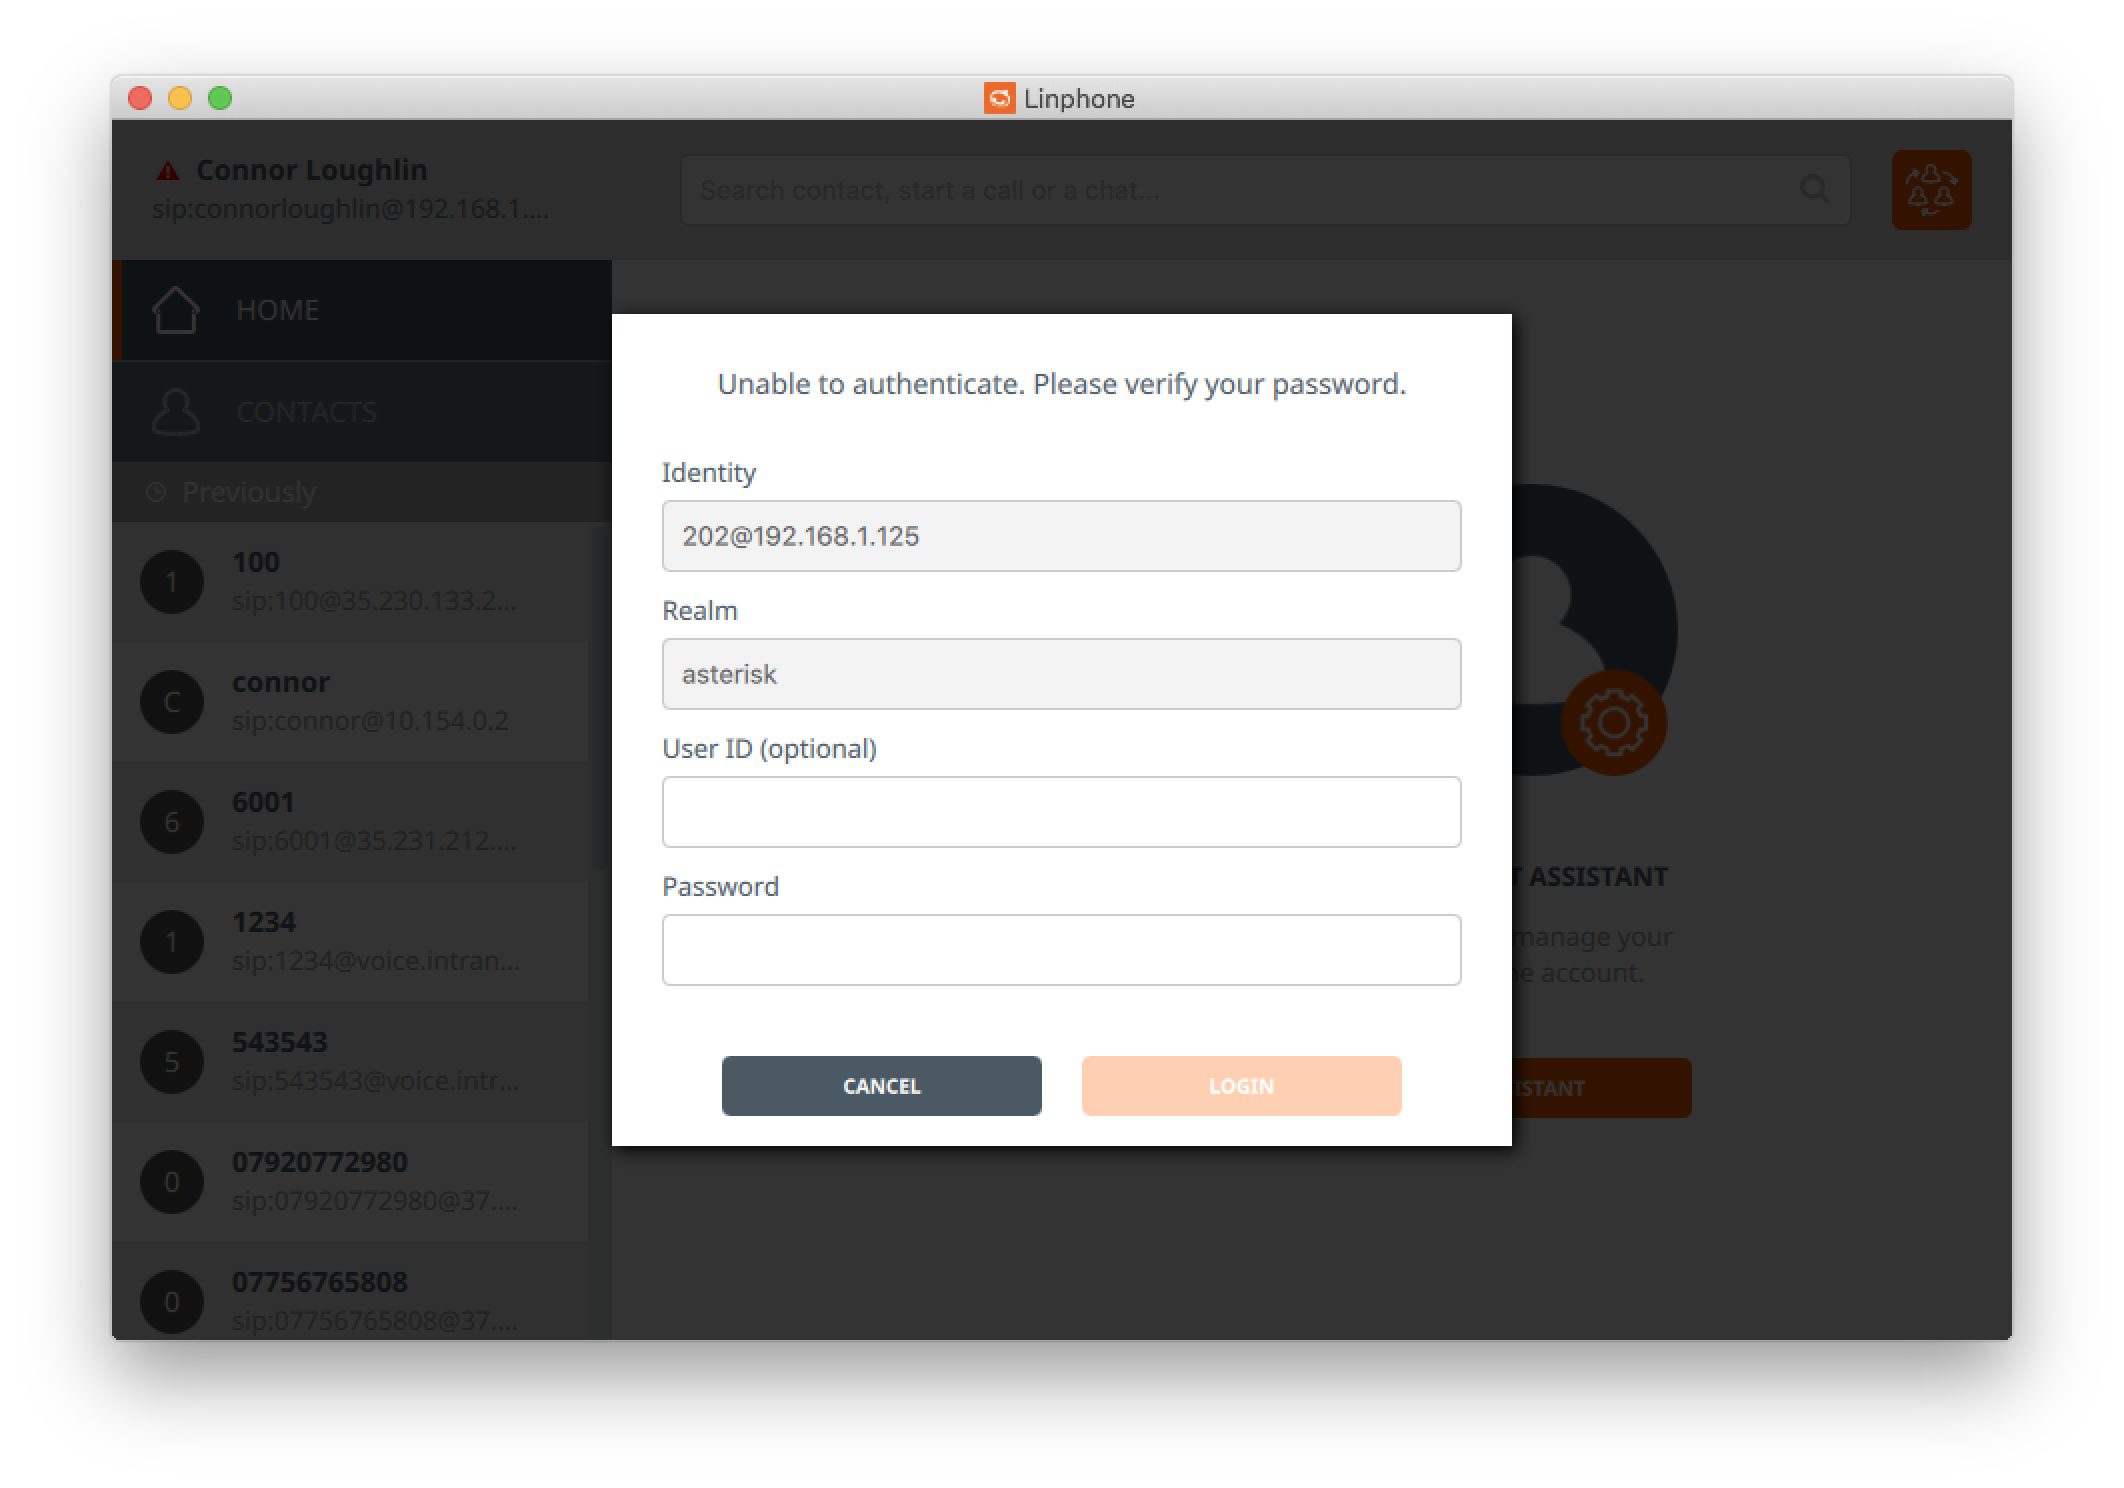
The configuration is the same as the IP phone, it should look something like this:

The IP addresses here are the Asterisk Server IP address, after clicking 'Confirm' you'll be asked to login, use 202 as the username and 'password456' as the password:
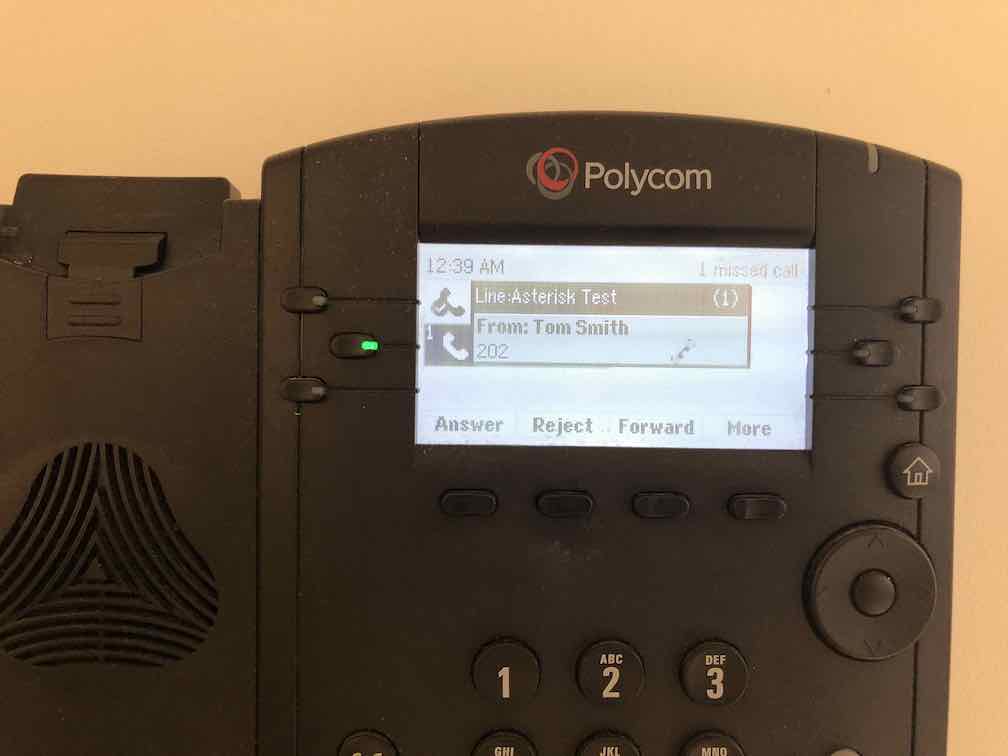
If it connects, you should see this at the top left of the window:

Try a test call to 201! You should be able to make the call!
Pickup the phone, you sound lovely. This concludes this simple tutorial to get Asterisk working on a local network. Kudos to you if you got this far.