How to Create a Table of Contents on Ghost

Table of Contents
How to Create a Table of Contents on Ghost
If you're like me, you love reading stuff on the internet. But sometimes you don't have time to read everything, or you just want to skip to the juicy bits. That's why a table of contents is awesome. It lets you jump to any section of an article with a click of a button.
Wondering how you make one for your own for your blog on Ghost without coding skills? Well, wonder no more, because I'm here to share with you my secret trick that made it possible for me! Trust me, it's easier than you think!
Steps to Make a Table of Contents for Ghost
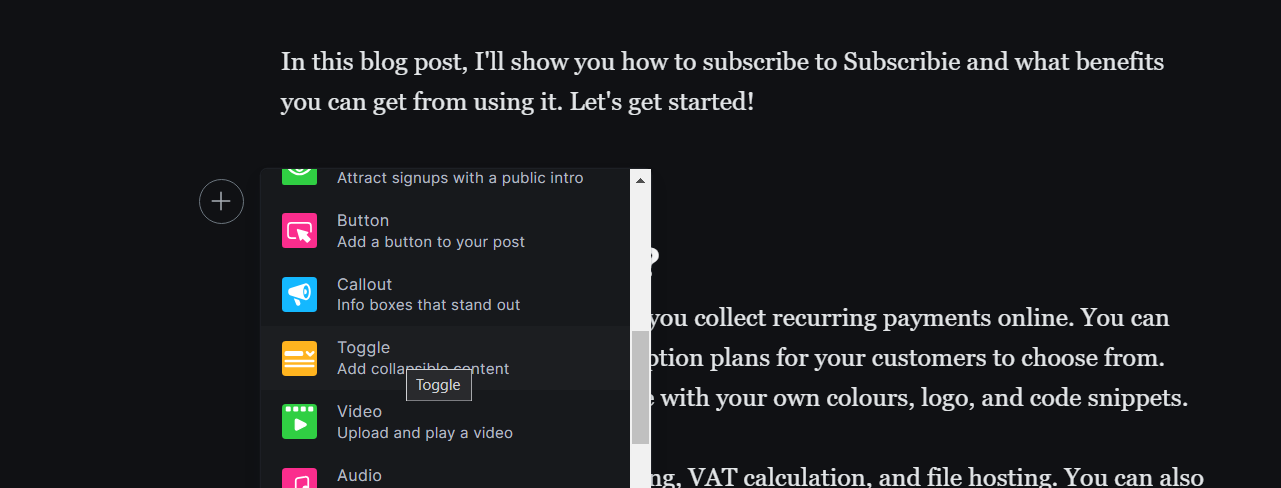
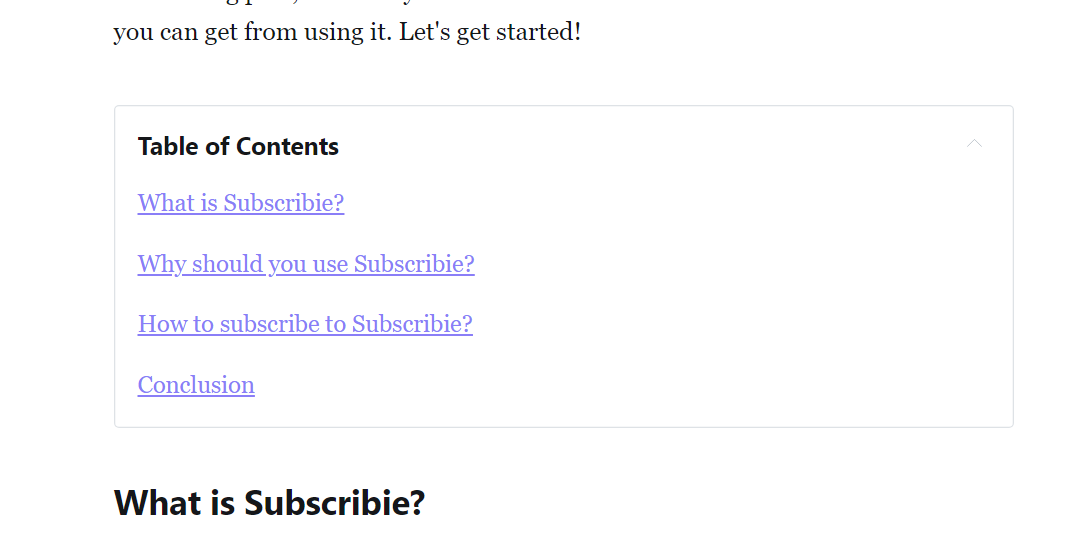
Step 1: Write your article and insert a Toggle element where you want your table of contents to be.
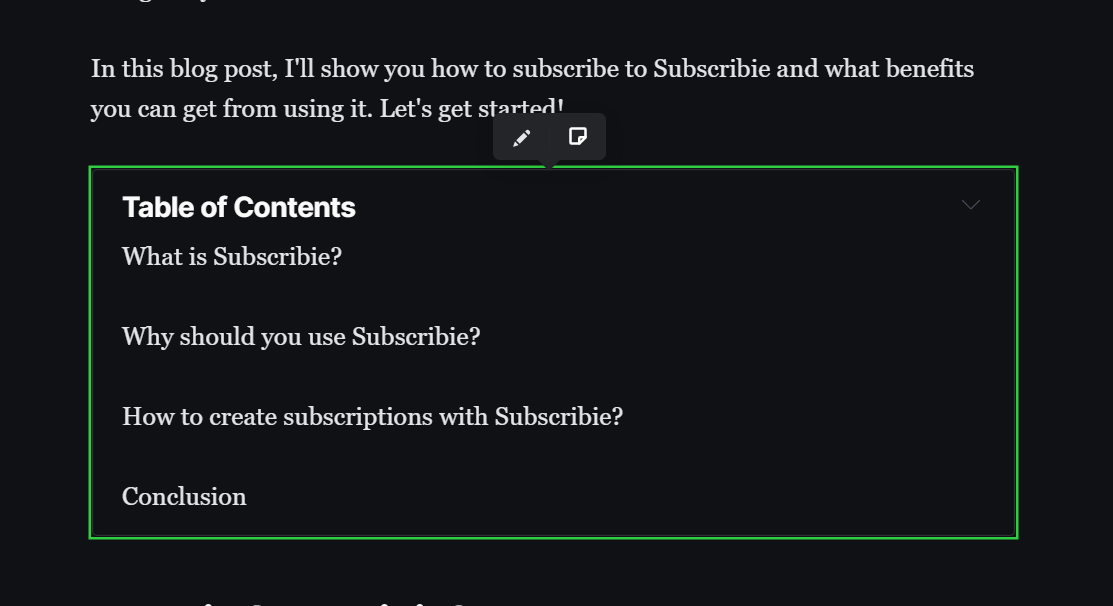
Step 2: Copy and paste all your headings into the Toggle element.
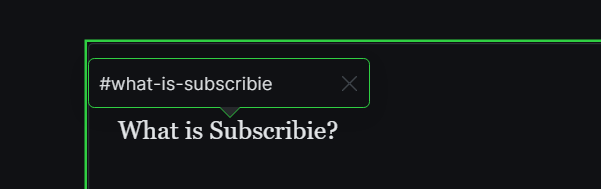
Step 3: In the Toggle element, highlight a heading and press the link icon to create a hyperlink for it.
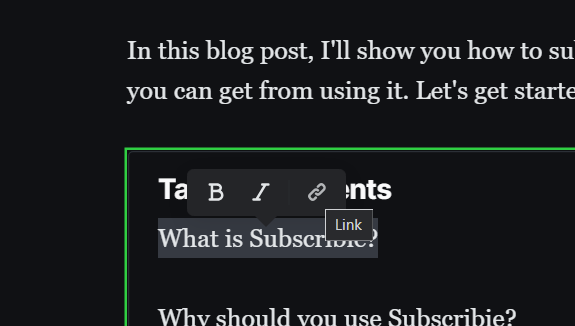
Step 4: Type a hash (#) followed by the heading with dashes (-) instead of spaces. A comparable example is the slug portion of a URL.
Do this for all your headings and voila! You have a table of contents that works like magic. Enjoy!
Subscribe if you want more helpful Tips and Guides from us, we'll be sure to make it worth your while. 😄