Upgrading from old ghost to ghost 1.x without CLI

This builds on the super helpful posts by Kevin, and Tom post on the same topic.
We run multiple light-traffic ghost instances at Karma Computing, so the Ghost CLI isn't really helpful for our use-case because it dosn't allow multiple instances (yet). This post exmplains how to install Ghost without the ghost tool, and then post 2 how to run multiple instances with systemd.
1. Take a backup
Backup your current ghost directory, and check it. No excuses.
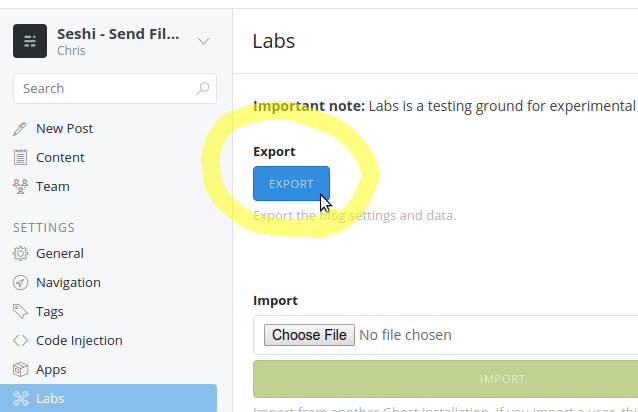
2. Export your content
From your old ghost blog use the export function to get a JSON export of your posts:
Now we're ready to start setting up ghost 1.x without the need for the ghost cli.
Installing Ghost without ghost CLI
We assume a ubuntu 16.04 LTS box with no yarn or nvm installed yet
Install NVM (Node Version Manager)
Note: Installing node version manager (NVM) is not required. It helps if you're working with multiple node projects requiring different node versions. If you find yourself stuck between needing node version x for project 1 and node version y for another, then you need nvm.
Download & install nvm:
Review source before blindly running:
curl -o- https://raw.githubusercontent.com/creationix/nvm/v0.33.8/install.sh | bash
To 'activate' nvm in your current terminal session run the following (or just close and reopen your terminal):
export NVM_DIR="$HOME/.nvm"
[ -s "$NVM_DIR/nvm.sh" ] && \. "$NVM_DIR/nvm.sh" # This loads nvm
[ -s "$NVM_DIR/bash_completion" ] && \. "$NVM_DIR/bash_completion"  # This loads nvm bash_completion
The above ads nvm to your local environment, mening when you type nvm your PATH is pointing to the nvm executable. Learn more.
Get the latest version of node:
nvm install node
At the time of wrtiting this will set your node version to 9.6.1, but this was too new for Ghost. Therefore using nvm we can switch to a lower version of node.
amperize@0.3.7: The engine "node" is incompatible with this module. Expected version "^4.5.0 || ^6.9.0 || ^8.9.0".
To switch to node version 8.9.0:
nvm install 8.9.0
The nvm install instruction will download and activate the specified version of node. TAren't you glad you have nvm now!
Install Yarn
The yarn install instructions at the time of writing are:
curl -sS https://dl.yarnpkg.com/debian/pubkey.gpg | sudo apt-key add -
Add the source list:
echo "deb https://dl.yarnpkg.com/debian/ stable main" | sudo tee /etc/apt/sources.list.d/yarn.list
Get the Yarn package list
sudo apt-get update
Install yarn. Note, as we're using nvm, we can skip install-recommends:
sudo apt-get install --no-install-recommends yarn
Add nodejs as an alias:
vim ~/.bashrc
Add alias nodejs=node to the bottom of your ~/.bashrc file. More about bashrc.
If you wern't using nvm then you'd simply do sudo apt-get install yarn
Congrats, you have yarn.
Begin installing Ghost
Not you've got node & yarn installed we can install ghost using Yarn, without the need for the ghost cli.
Initialise the yarn project
yarn init
Fill in as desired, or just leave defaults.
Import Ghost@latest into the project
yarn add ghost@latest --save
Change Ghost 1.x production config database & port
Ghost uses nconf to manage different local/production settings. This tutotial sets up the production settings choosing sqlite at the database.
The ghost team have warned that they may start favoring mysql in the future. So just a heads up there. For us, the simplicity of simple sqlite databaes makes sense for light-traffic sites.
Setup production congig using core's template
Copy the config.development.json file into your main project folder renaming it to production: We need to edit it to set the database, url and port settings.
cp node_modules/ghost/core/server/config/env/config.development.json config.production.json
Edit your config file, this example sets the port to 2369, and the database to sqlite3.
{
    "url": "http://blog.example.com",
    "server": {
        "host":"127.0.0.1",
        "port": 2369
    },
    "database": {
        "client": "sqlite3",
        "connection": {
            "filename": "content/data/ghost.db"
        },
        "debug": false
    },
    "auth": {
        "type": "password"
    },
    "paths": {
        "contentPath": "content"
    },
    "logging": {
        "level": "info",
        "rotation": {
            "enabled" :true
        },
        "transports": ["file", "stdout"]
    },
    "privacy": {
        "useRpcPing": false,
        "useUpdateCheck": true
    },
    "useMinFiles": true,
    "caching": {
        "theme": {
            "maxAge": 0
        },
        "admin": {
            "maxAge": 0
        }
    }
}
Note that we've removed the trailing slash "/" from "content" in the
pathssetting. This causes ghost to look in your root directory for content, and not within node_modules. Thanks Kevin for pointing this out.
Create an index.js file for Ghost
Given we've imported Ghost using yarn just like any other module, we need to import in and run the server. This index file is where our package.json main points to:
index.js:
var ghost = require('ghost');
var path = require('path');

ghost().then(function (ghostServer) {
    ghostServer.start();
});
Copy over the content directly to your base directory
Use the existing ghost content directoy in node_modules as a templte for your own content folder:
cp -r node_modules/ghost/content ./
Install knex-migrator
knex-migrator will eventually populatate your initial database schema. Install it first!
npm install -g knex-migrator
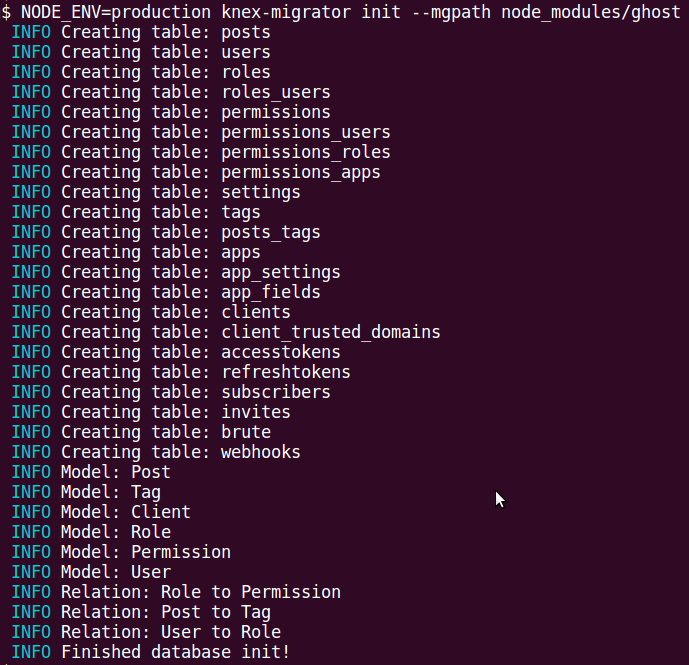
Now run the migrations to setup the required tablesin the sqlite3 database:
NODE_ENV=production knex-migrator init --mgpath node_modules/ghost
Success looks like this:
Start ghost
You're now ready to start ghost:
NODE_ENV=production node index.js
Visit example.com/ghost to complete the setup steps.
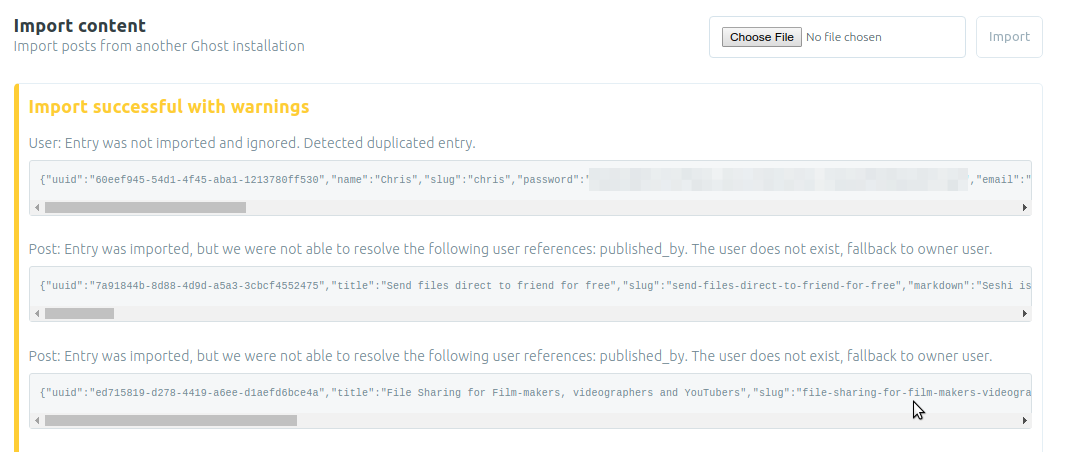
Import your old blog content
Then visit the Labs section and re-import the content you backed-up earlier from your old blog:

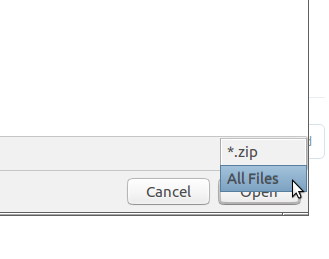
Be sure to change the file options from
Zipto 'All files' else you don't see your.jsonbackup from older ghost exports.
A successful import might have a few warnings, don't worry by default any mismatched authers will be put into the current 'master' user:
Copy over your images: Get your images back
Chances are you're missing your pictures at this point. Older versions of ghost (pre 1.x) stored images in /content/images/... and the 1.0 follows the same pattern expect it's one directory below.
Locate the directy of your old images, and copy them over into your new instance:
cp -R /path/to/old/content/images/* /path/to/new/content/images/
Restart your ghost instance, and you'll see your images pop back into place!
Run ghost as a service using Systemd
Run forever ghost, even after reboots. To achieve this you can create a systemd config file. Follow along!
Running ghost without NODE_ENV=production node index.js is great for debugging, but we need to register ghost as a service else it's not going to be there when you reboot.
Create a systemd profile for ghost
We'll call the service ghost-blog.
How to create a systemd service goes something like this:
- Create a service definition file
- Reload the systemd daemon
- Start your ghost service
- Enable the ghost service for autostart on boot (optional)
1. Create the systemd service file
sudo vim /etc/systemd/system/ghost-blog.service
Example ghost-blog.service file contents:
[Unit]
Description=Karma ghost blog
After=network.target

[Service]
Environment=NODE_ENV=production
Type=simple
User=www-data
WorkingDirectory=/path/to/your/ghost/blog
ExecStart=/home/<username>/.nvm/versions/node/v8.9.0/bin/node index.js
Restart=on-failure

[Install]
WantedBy=multi-user.target
Items to check:
Environmentsets ghost to run in production, and thus reads ourconfig.production.jsonfileUserneeds to be set to your user account which is runing the ghost instance. This might be your own username (e.g.fred) orapache,www-data,httpdetc.WorkingDirectoryis the base path to your ghost installExecStartis the absolute path (not relative path) to the version of node your using. To find out, runwhich nodefrom your ghost directory.
2. Reload the systemd daemon
sudo systemctl daemon-reload
3. Start your ghost service
sudo systemctl start ghost-blog
But wait? How to check status of a systemd service?
Just pass systemcty status the name of the service you want to know about:
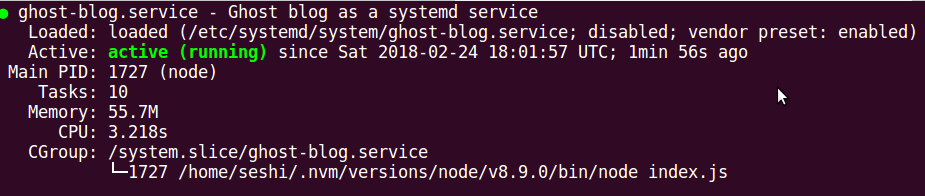
sudo systemctl status ghost-blog
Which gives you access to the status, and stdout of the running ghost process:
4. Enable ghost service for autostart on boot (optional)
sudo systemctl enable ghost-blog
Learn more about systemctrl.