How to POST to a RESTfull endpoint in Drupal 8 with basic authentication

How to configure a REST endpoint in Drupal 8 and perform a POST (create a new node) via a HTTP POST request.
Be aware there's been important changes in how to configure Drupal 8 for REST from Before Drupal 8.2. Thus, be mindful for the tutorials you're reading and check the dates! This includes this article!
- Drupal Restful web services overview.
For example, regarding Permissions, you now only have to set permissions in one place. You used to have to grant separate permissions for rest endpoints however now in 8.2 and above you no longer need this since Drupal's REST automatically check access using the Entity Access API.
1. Enable Basic Authentication Provider Module & HAL
Enable the basic_auth and hal module both of which come with Drupal 8.
Basic auth is to require content creation from only authenticated users, and hal is a convenient (draft) standard for expressing relations between content.
HAL is a simple format that gives a consistent and easy way to hyperlink between resources in your API.
- Mike Kelly, The Hypertext Application Language
Enable basic_auth & hal module Using Drupal Console:
 vendor/bin/drupal moi basic_auth
 vendor/bin/drupal moi hal
Or via gui:

Don't forget to enable the hal module!
This will have the effect of adding basic_auth: 0 and hal: 0 to your /config/sync/core.extension.yml file once you perform a config export.
If your working in a team using Drupal with git for version control, you'll want to commit these changes after performing a config export for each change.
2. Enable REST UI (optional)
To make it easy install and enable the REST UI module.
Drupal Console: Install and enable REST UI module
composer require drupal/restui
vendor/bin/drupal moi restui
The REST UI module avoids you having to manually create your config/sync/rest.resource.entity.node.yml file. We assume you're using the REST UI module, but have explain both ways below.
2. Set REST Settings For Content Resource
Go to REST UI settings via Home -> Administration:

Enable the 'Content' Resource:

Since we're concerned with POST (creating new content via a POST request), enable the POST method, and GET for convenience.
For Accepted request formats choose hal_json as this allows us to express links between content, and set the content type which we wish to POST new content to.
For Authentication providers, choose basic_auth which we appears as an option due to enabling the module earlier.
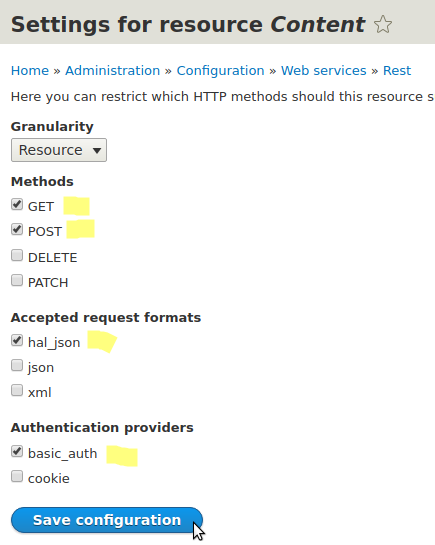
We have enabled the 'basic_auth' as the authentication provider option since we've enabled the module; Drupal has a pluggable authentication provider system. The two two authentication providers Drupal 8 comes built in with are Basic Auth and Cookie.
3. Export your REST configuration (optional)
If you're working in a team with Drupal using git, you'll want to export this new configuration and merge it with your codebase.
Either using the gui or drupal console, export your site configuration. Use Drupal console or Drush rather than the ui, it will save you time and error.
Export Config Using Drupal Console:
vendor/bin/drupal config:export
Or via the gui:
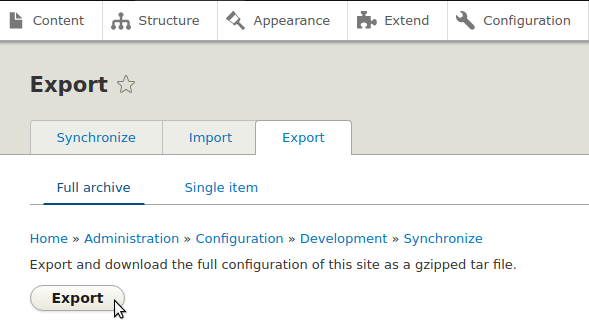
Since you've enabled RETST on Content nodes, the drupal console config export will have created an additional config file:config/sync/rest.resource.entity.node.yml.
File rest.resource.entity.node.yml:
uuid: 678r44d5-4v5f-49ta-g333-g2cgd81d00d2
langcode: en
status: true
dependencies:
  module:
    - basic_auth
    - node
    - serialization
id: entity.node
plugin_id: 'entity:node'
granularity: resource
configuration:
  methods:
    - GET
    - POST
  formats:
    - json
  authentication:
    - basic_auth
Your uuid will be different.
Note: You could have also created this file manually without the need for the Rest UI module, and placed it into your config/sync directory and imported the change. If you do this, don't add a uuid field, and the Drupal import generates this for you.
4. Create a user account for REST purposes
Create a user account in Drupal which you're going to use for the creation of these nodes. This user will be the one you set in the Authorization Basic header.
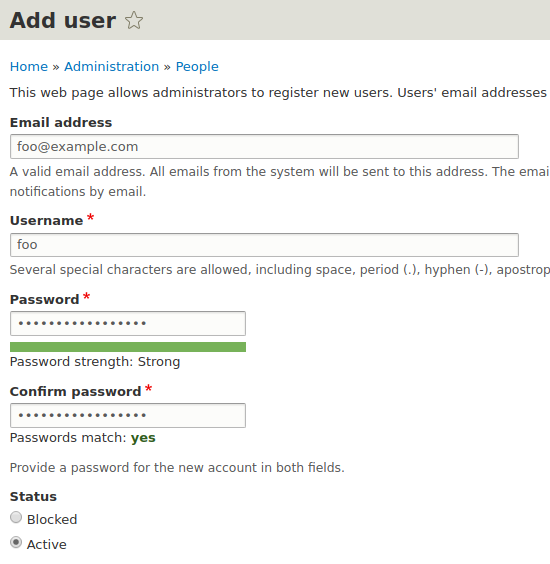
Here we create a user 'foo' and set the password to 'foo. Choose better credentials yourself!
If you don't set the right permissions for your user you will get the error:
"You are not authorized to create this node entity of bundle contact."
- Give your user the correct permissions
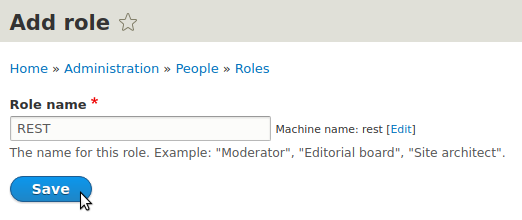
4.1 Create a role for your user
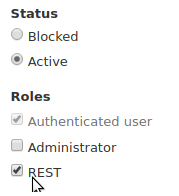
It's important for security to limit the possible damage a rest user can do, so create a new role, for example "REST" and give the new user this role.
4.2 Give new user the 'REST' role
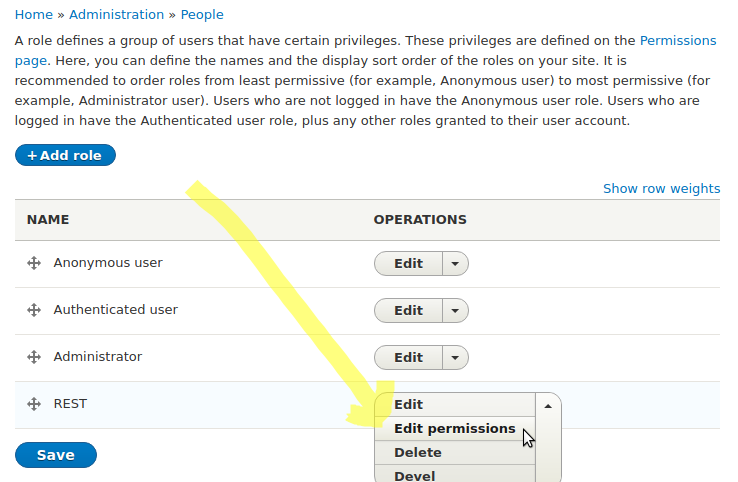
4.3 Give the REST role the correct permissions
You may want to give this role permissions to create/read/update/delete (CRUD) all nodes, or (preferably) just the one you want to expose.
Edit the permissions of the REST role you've just created.
Here we just give the role the Contact: Create new content permission because this tutorial is purely about creating content via Drupal REST. Obviously if you wanted full CRUD access you'd enable more:
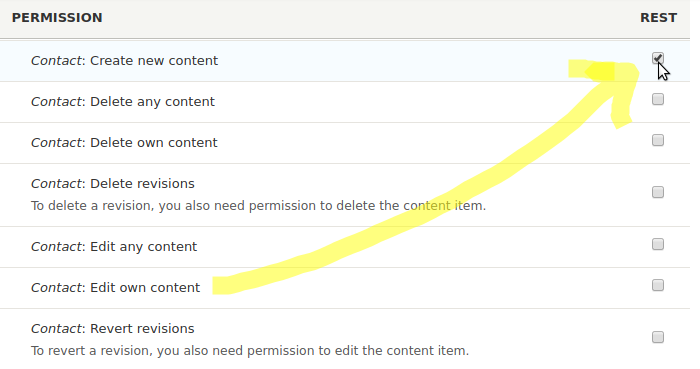
Give a little permissions as required for your use case.
5. Create Content Via REST POST Request
Understand that you can now create any content type (even your custom content types) via the rest API.
Because you've now configured rest on Drupal's entity.node type, and allowed POST requests with basic authentication you can restfully create any of your content types. This is because all content types you create inherit from the Node type in Drupal (see /core/modules/node/src/Entity).
In order for your REST POST request to be successful you need two things:
- Correct HTTP Headers set to:
- Content-Type: application/hal+json
- Authorization: Basic <Base64EncodedUser/Password>
- X-CSRF-Token: abcxyz
- Valid payload (data) matching the field(s) of the content type you are creating
To use Drupal rest to create content types with custom fields you need to specify the node type (content type) in the body of your request with the
_links.type.hrefattribute.
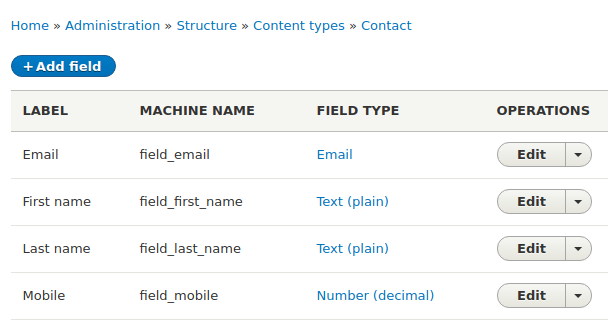
For example, suppose you have made a custom content type Contact which has 5 fields:
- title
- field_email
- field_first_name
- field_last_name
- field_mobile
For example:
To build a POST request for this content type you must include the content type along with the request in a _links object in JSON.
Note the _links property for the Contact content type. For our Contact content type, the _links.type attribute would be: http://example.com/rest/node/contact.
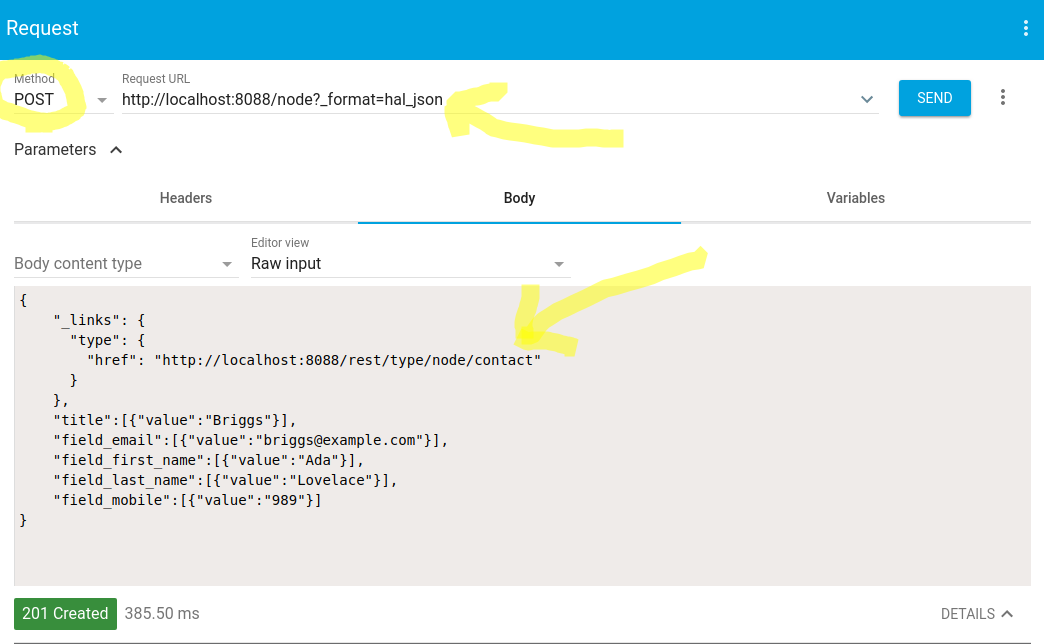
The complete payload becomes:
{
    "_links": {
      "type": {
        "href": "http://localhost:8088/rest/type/node/contact"
      }
    },
    "title":[{"value":"Briggs"}],
    "field_email":[{"value":"briggs@example.com"}],
    "field_first_name":[{"value":"Ada"}],
    "field_last_name":[{"value":"Lovelace"}],
    "field_mobile":[{"value":"989"}]
}
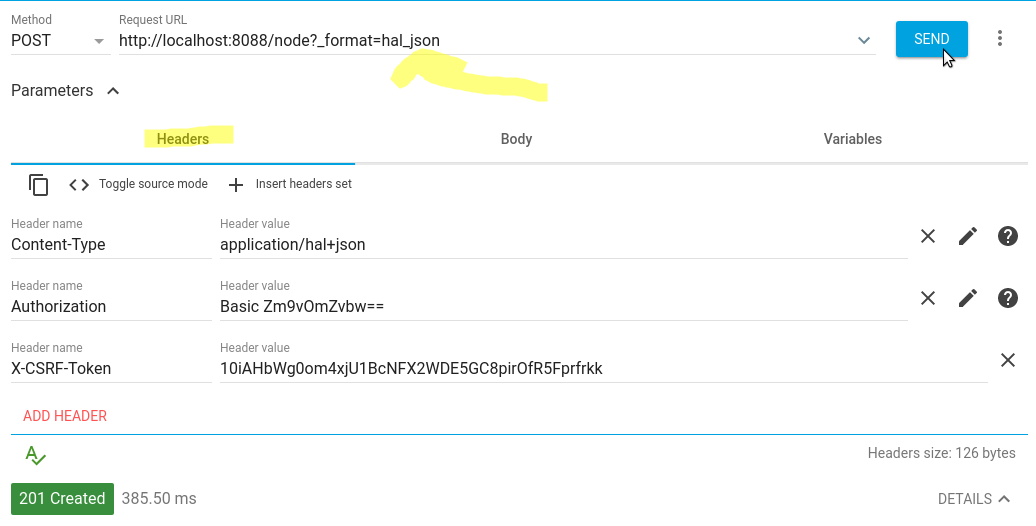
The headers for the request would be:
Content-Type: application/hal+json
Authorization: Basic Zm9vOmJhcg==
X-CSRF-Token: 10iAHbWg0om4xjU1BcNFX2WDE5GC8pirOfR5Fprfrkk
Authorization Header: Is for the Basic Auth credentials, which are a base64 encoded string of your username:password.
X-CSRF-Token: Is a security mechanism to mitigate Cross Site Request Forgery (CSRF)
You get this token by visiting (manually or programmatically) example.com/session/token.
Note on security & securing Drupal Rest: Basic Authentication offers no dependable security unless you combine it with something like SSL. The authorisation header username and password are Base64 encoded, not encrypted. Anyone with access to your network would can decode the base64 string containing your user credentials. Take steps to protect these, by only permitting access to your endpoints over SSL, and give your 'rest' user account as least privileges as needed.
5.a Example Using Advaced Rest Client to Create New Node
Here we use Advanced Rest Client to create a new node of the 'Client' content type. We then do an example using python code.
Set correct headers
Set correct body
If you had another content you wanted to POST to like (lets say, 'Car') then your _links.type.href attribute would be: http://example.com/rest/node/car, and update your fields accordinly.
5.b Drupal 8 REST create new node programmatically with custom fields
Here we use Python with the Requests library to create a new Contact via a POST request, passing all the required headers and fields:
example.py</small
import requests

#Get CSRF token
token = str(requests.get('http://127.0.0.1:8088/session/token').text)

endpoint = 'http://localhost:8088/node?_format=hal_json'

#Set all required headers
headers = {'Content-Type':'application/hal+json',
    'X-CSRF-Token':token
}

#Include all fields required by the content type
payload =  '''{
    "_links": {
      "type": {
        "href": "http://localhost:8088/rest/type/node/contact"
      }
    },
    "title":[{"value":"abc"}],
    "field_email":[{"value":"abc@example.com"}],
    "field_first_name":[{"value":"BDa"}],
    "field_last_name":[{"value":"gkl"}],
    "field_mobile":[{"value":"989"}]
    }'''

#Post the new node (a Contact) to the endpoint.
r = requests.post(endpoint, data=payload, headers=headers, auth=('foo','foo'))

#Check was a success
if r.status_code == 201:
    print "Success"
else:
    print "Fail"
    print r.status_code
The python code above utilises our Drupal 8 RESTful endpoint to create a new entry of our custom content type Contact which has the custom fields first name, last name etc. The 201 response code means that the request succeeded and a new node has been created.
Note that the Authorization header is added in Python by passing an auth dictionary when we fire off the POST which is easier than manually encoding the authentication details as per Requests docs.
Congrats! You've successfully configured and created new content for your custom content type using Drupal's REST services module using JSON + HAL.
See also
- How to install Drupal using composer
- HTTPbin Useful for testing